
Administrators are responsible for creating new users and assigning them appropriate permissions.
Prerequisite in Entra
-
The user must exist as a user in the tenant (in Entra)
-
There user must be assigned a valid Business Central license in Entra.
-
If no license is available for assignment to the user, contact Wisefish through https://wisefish.atlassian.net/servicedesk/customer/portal/28
-
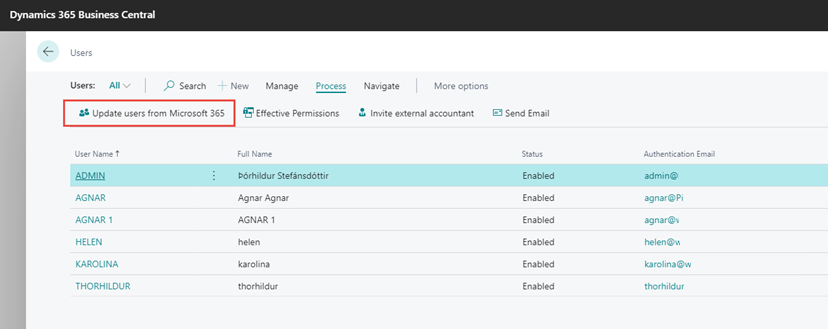
Import users into Business Central
Once the setup of users in Entra is complete, go into Business Central and update the users there. To import the user into Business Central, go to the search and search for Users and select the option in the search. Click on Update users from Microsoft 365 to create the user in the list of Business Central users. On the user card, you can set which permissions the user should have and in which company.
Permission Sets
User permissions must be defined on the User Card.
The main user of the system has the permission SUPER. SUPER users have permissions to everything in the system. It is not desirable that all users have SUPER privileges. You can choose from permission sets for each user on the user panel.
Each set of permissions needs to be carefully considered before defining it for a user. You can define permissions to different companies. If an employee is to handle wages in company A but not in company B, you can define this by selecting Company in the source line.
Manage user settings and preferences
As an administrator, you can configure user settings in Business Central, similar to how individual users can manage their own preferences in the My Settings page.
Select the user, then click on User Settings

The User Settings card page is similar to the My Settings page that each user has access to, and it's a powerful tool for you as the administrator for setting default settings and clearing personalized pages, for example.
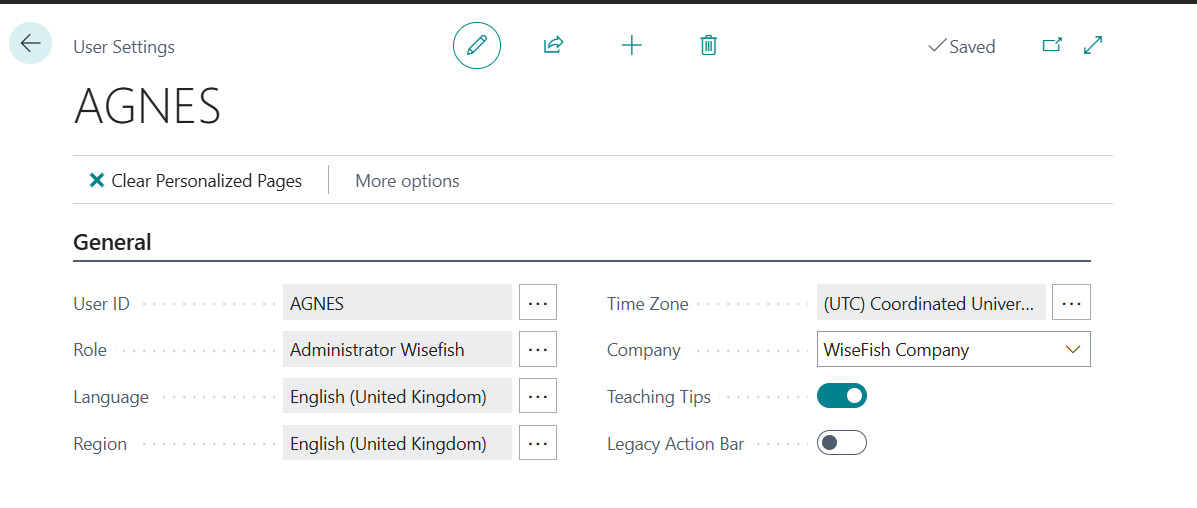
💡 It is important that users have the correct region and time zone. See information here: https://learn.microsoft.com/en-us/dynamics365/business-central/admin-manage-user-settings-preferences