
Instructions for installing and setting up Wisefish Insights Connector.
System setup assistance covers the steps you need to go through to set up the system. This is not a textbook. Installation of the system is carried out with the help of the system's "installation wizard" and outlines what information must be present and you will be guided through the installation step by step.
Welcome
We would like to begin by extending a warm welcome. In this document, we go through the process of installing the Wisefish Insights Connector in Business Central.
Four Simple Steps!
Step 1: Contact us
Step 2: Install our Power BI apps
Step 3: Connector the Power BI app to the Wisefish Insights Connector
Step 4: Share the Apps within your organization
Step 1: Contact us
-
Send a support ticket through our portal and ask for the Wisefish Insights Connector.
-
We’ll install it to your BC/Wisefish environment in no time!
Step 2: Install our Power BI Apps
-
Pick which Power BI app to install from AppSource
-
Click on the Power BI app you would like to install and click Get it now

-
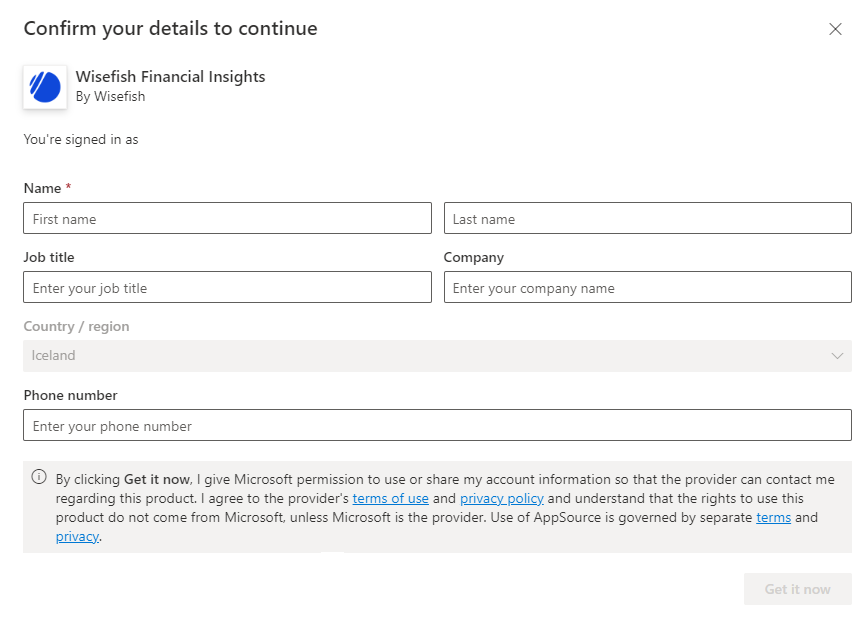
Fill out the form and click Get it now
-
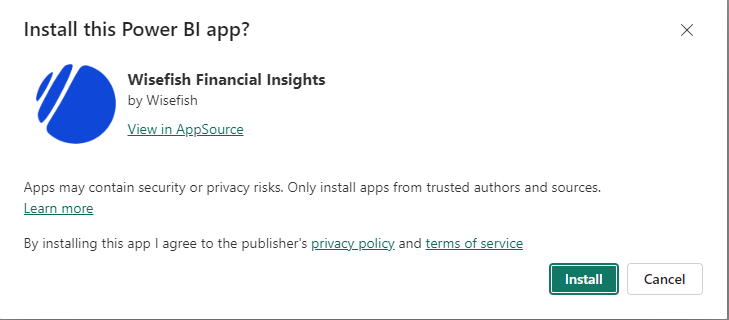
Click Install
Step 3: Connect the Power BI App to the Wisefish Insights Connector
Each app will install its own Power BI app workspace.
-
The Power BI service will need a user to connect to Business Central when refreshing the report data
To assign permissions in Business Central, follow these steps:
-
Sign in to Business Central at https://businesscentral.dynamics.com/
-
In the search, enter Users
-

-
Open the User Card
-
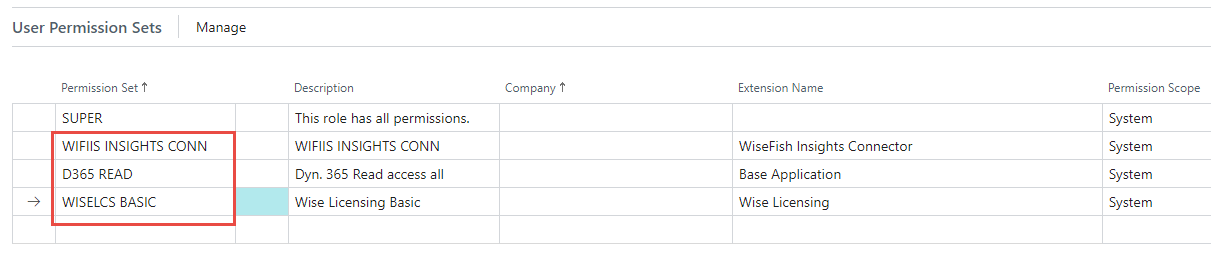
The user account should have the following permissions sets:
-
WIFIIS INSIGHTS CONN
-
WISELCS BASIC
-
D365READ
-
-
-
The user account needs to be licensed with Dynamics 365 Business Central Team Members.
-
Log into Power BI
-
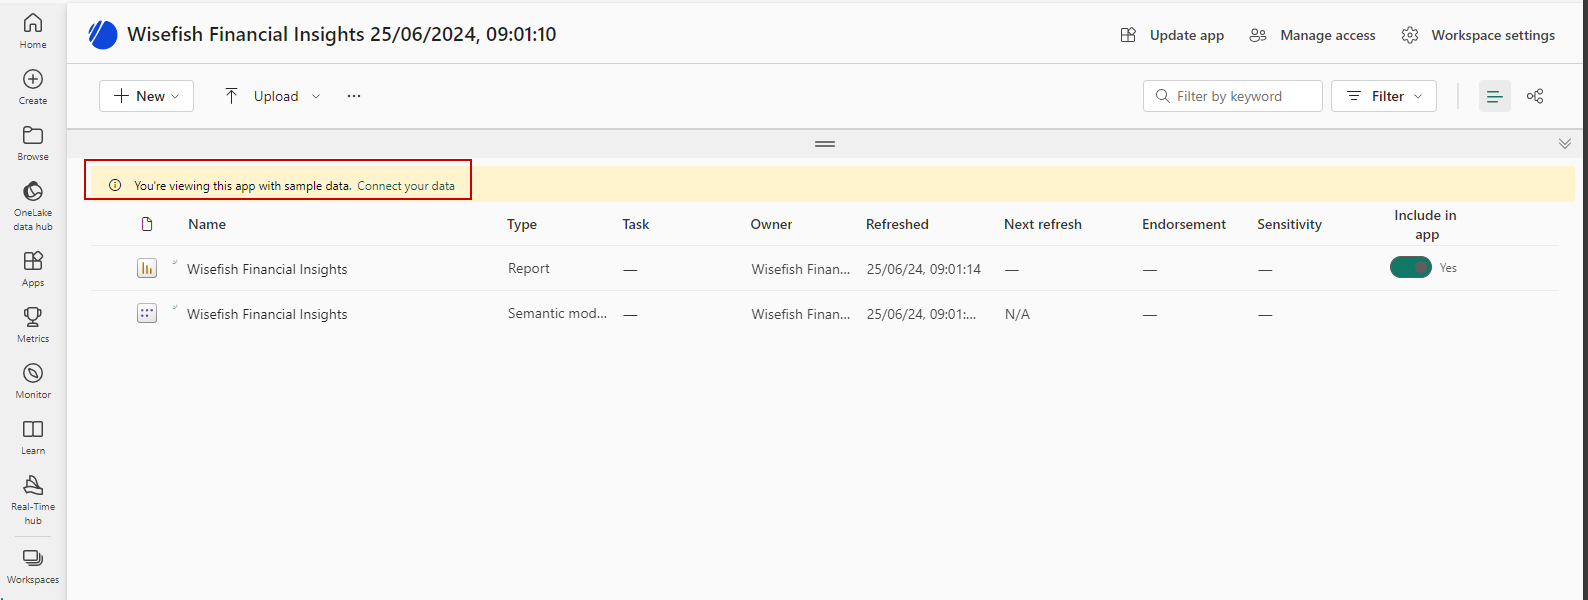
Select Workspaces in the left menu and open the same name app workspace

-
Click Connect your data
-
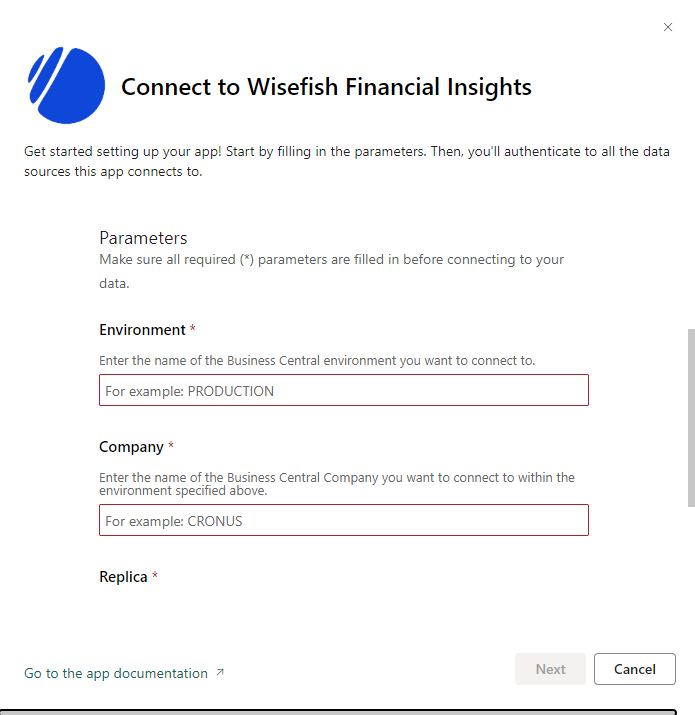
Fill out the parameters
-
Enter the Environment parameter as uppercase
-
Enter the Company name (not display name) parameter
-
Choose false for read only replica
-
-
Select the OAuth2 authentication method and click Sign in and connect
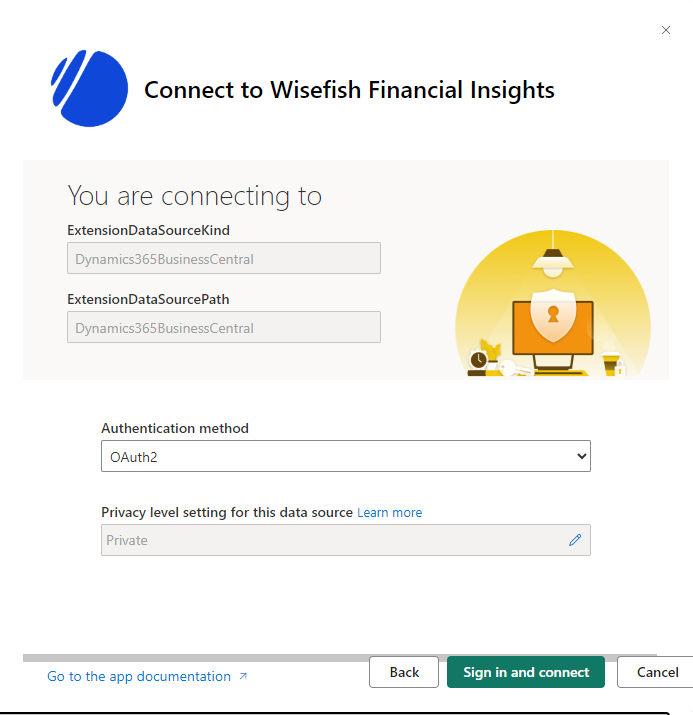
-
Sign in as the user you assigned the appropriate permissions
-
After you’ve successfully signed in with the Business Central user account, the dataset refresh will start automatically!
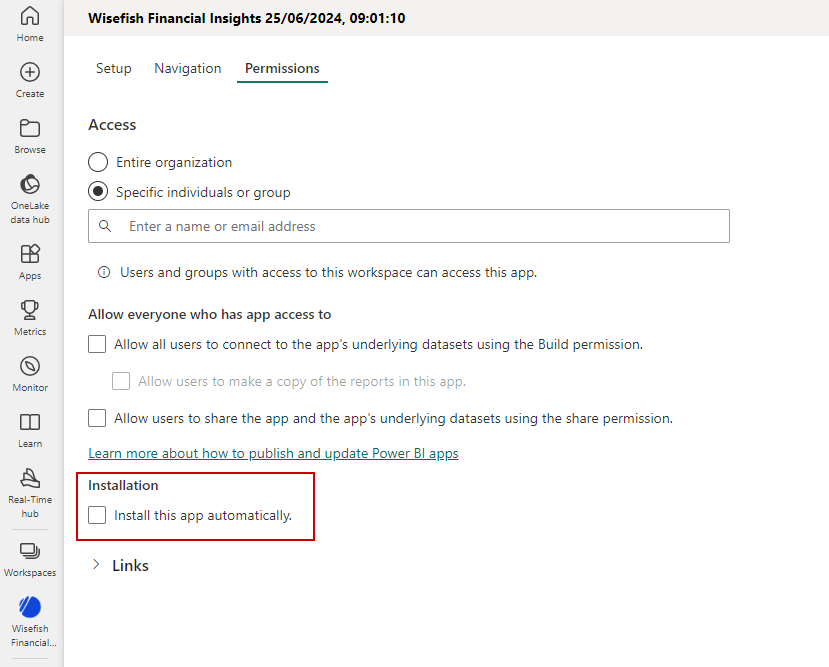
Step 4: Share the Apps Within Your Organization
-
Sign in to Power BI
-
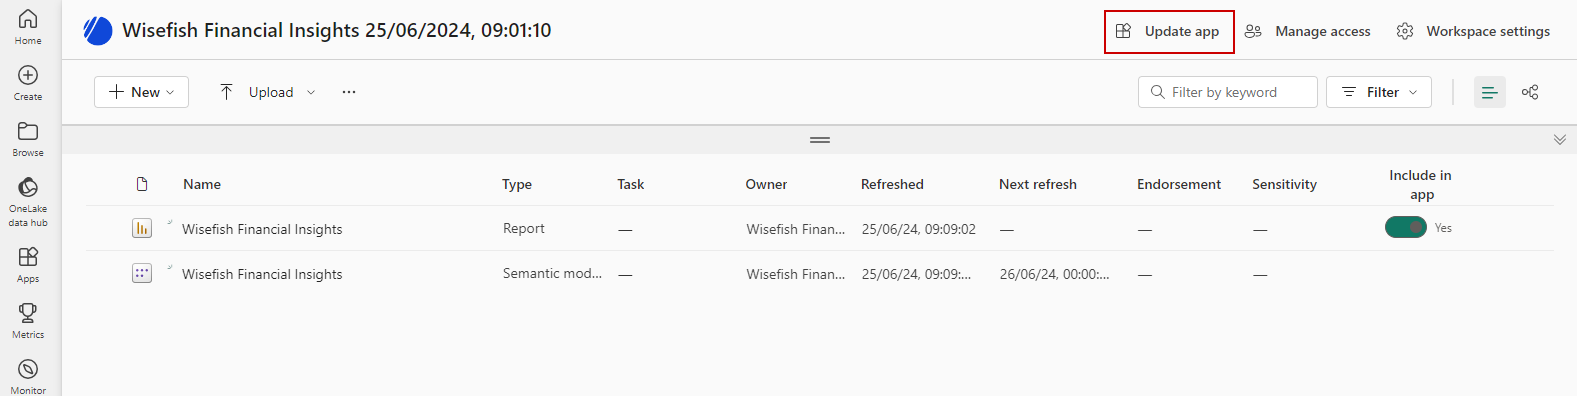
Select Workspaces menu and open the app workspace you require
-
Select Update app in the top right corner
-
Select the Permissions tab and add users or user groups that can access the apps
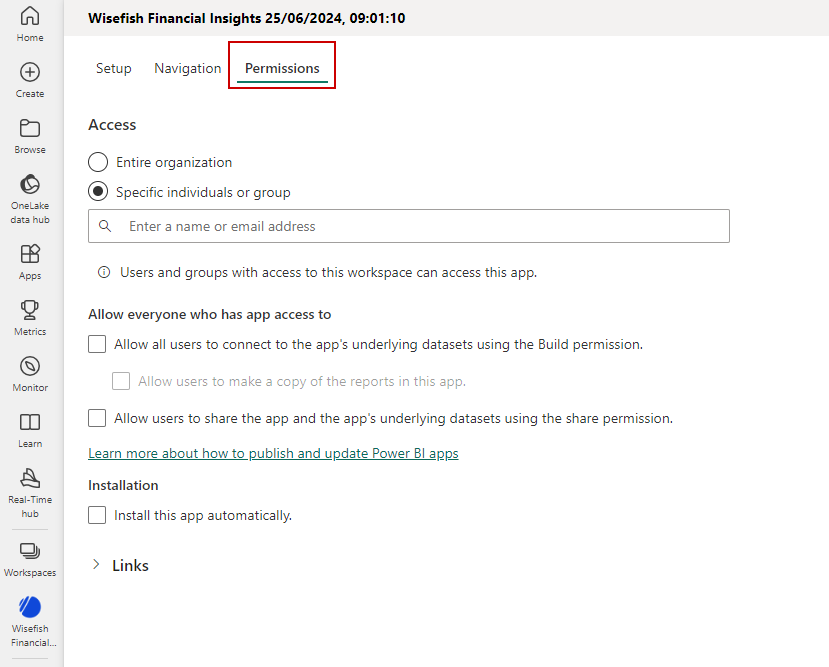
-
Select Install this app automatically so that the app will be installed for the selected users
-
Select Update app
Make sure you only share the Power BI apps with those who can see the entire contents of the apps and should have access to this data.
The basic setup is now complete and you can start taking advantage of the Wisefish Insights Connector
Contact Information
For additional information contact the Wisefish service desk. The service desk is open Monday through Friday from 9:00 – 17:00 (GMT). Click here to go to our service portal and create a service request.
We can also be reached through the email support@wisefish.is.
Useful Links
Below are some helpful links for Business Central users. Click on the name to open the link in a browser.