
The Inspection Detail Subform contains the Quality Details that have been attached to the inspection. This page describes the available actions for this list.
Setting New Defaults
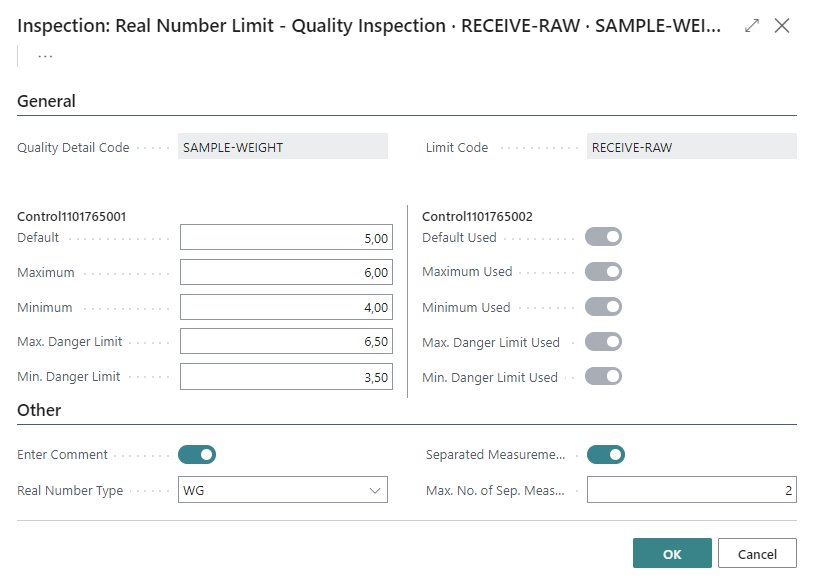
It is sometimes desirable to reference more than one parameter set for a quality detail. For example, you may normally have a default of 15 bits and a minimum of 12 bits. However, for one inspection you may wish to define the default to 30 and the minimum of acceptable no. of bits to be 25 as a different parameter.
Rather than having to set up two Quality Details for no. of bits, you can customize the no. of bits range for the quality detail just for this particular inspection without having to alter the regular generic range you have established.
-
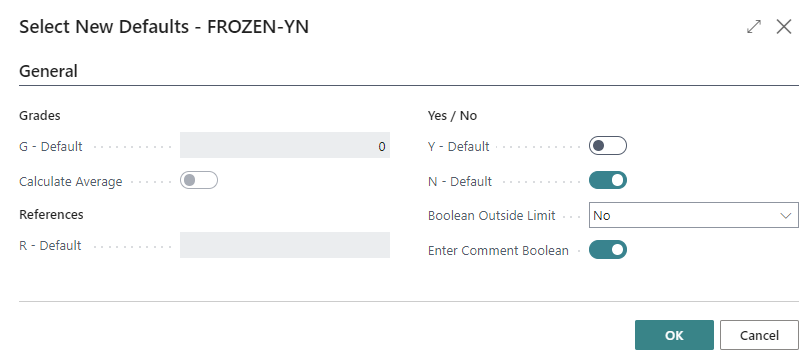
Select the line in the Inspection Detail Subform whose parameters need to be adjusted and run action Line > New Defaults.
-
If the type of Quality Item selected requires a Real Number, any of the parameters which can be specified for a real number quality type can be adjusted in the subsequent form:
Defining Corrective Actions
An effective quality control system not only alerts you when a monitored parameter deviates from the acceptable limits you have established, it also recommends a corrective action to be taken if a Critical Limit is exceeded during monitoring. This corrective action is designed to bring the hazard back into control.
See more in chapter Quality Inspection Responses
Calculations Derived from Inspected Values
In some cases calculations must be performed out of the inspected or measured values.
See chapter Creating Calculated Fields
Re-arranging the entry order of Quality Details
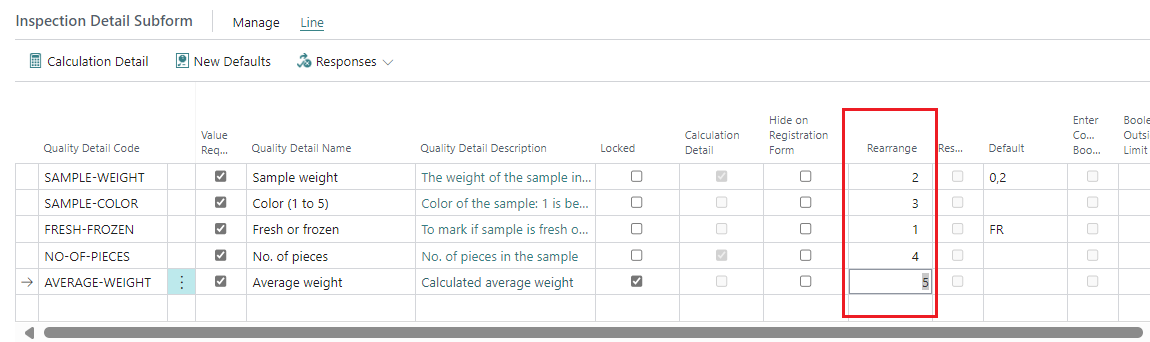
On occasion, it is necessary to add an new item to an already defined inspection. When the item is added, it will be automatically added to the end of the list of quality items. You may however, wish for the item to appear at an earlier point in the inspection form. This is accomplished using the Rearrange field. You can also use this field to simply adjust the existing order of the items for convenience.
-
Open the inspection and make any additions desired.
-
Enter a number in the Rearrange field (in the Control tab section of the Quality Inspection) to indicate its desired order of appearance in the inspection.
A number must be assigned to every entry in the inspection.
(For example, if you want to change a Quality Item to be the third item in the Inspection, enter a 3 for the item in the Rearrange field). -
When all Quality Items are numbered, click the Action > Rearrange Inspection form.
The items will be re-ordered according to the numerical order specified in the Rearrange field.
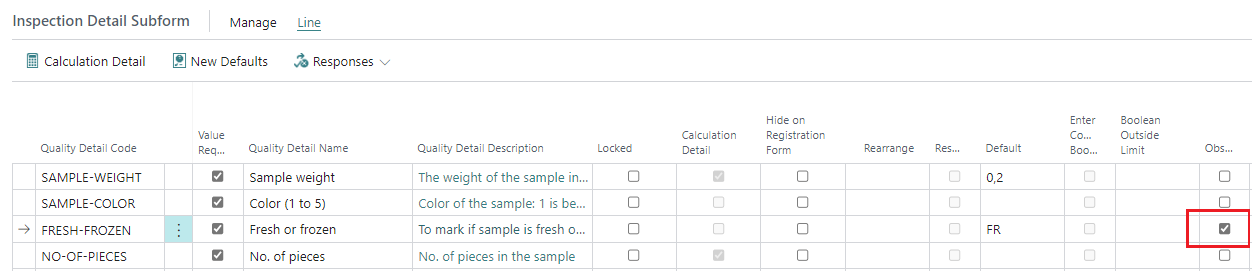
Remove a Detail from an Inspection
Once referenced in existing inspections, quality items cannot be deleted from the inspection template. However, if the item is no longer required in future inspections, put a checkmark in the Obsolete field.
sérstillingar gæðaskoðunar útreikniatriði ný sjálfgildi svör eyða gæðaskoðunaratriði
endurraða gæðaskoðunaratriðum