This chapter is about how to move a pallet to a new location within the warehouse or storage room.
In Business Central, the location is defined with both a Zone and Bin, where each bin belongs to a specific zone.
After a successful move, the pallet
-
will have a changed Bin Code
-
and possibly a changed Zone Code
Prerequisites when moving pallets
-
Pallet needs to have a barcode that exists in BC
-
The new Bin needs to either have a free capacity (not contain number of bins that exceeds the Capacity) or Wisefish can be set up so bin capacity is not used.
Move one pallet
This method is used when a pallet is moved to another Bin location, either in the same Zone or in another one.
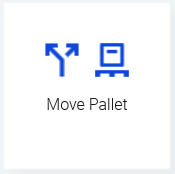
In Stream, start the Move Pallet feature from the main menu. The steps are as follows:
-
Scan the pallet
Scan the pallet barcode (or type it in) and then click the Confirm button.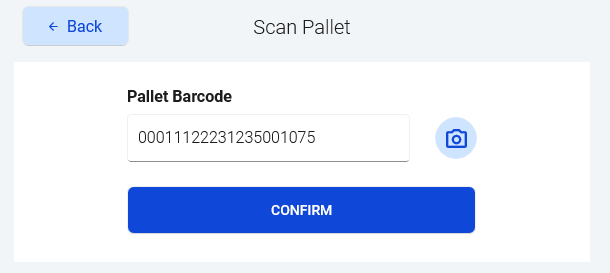
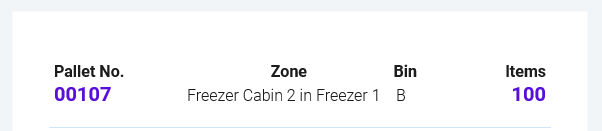
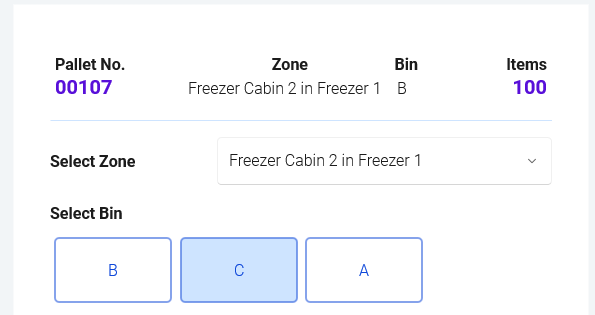
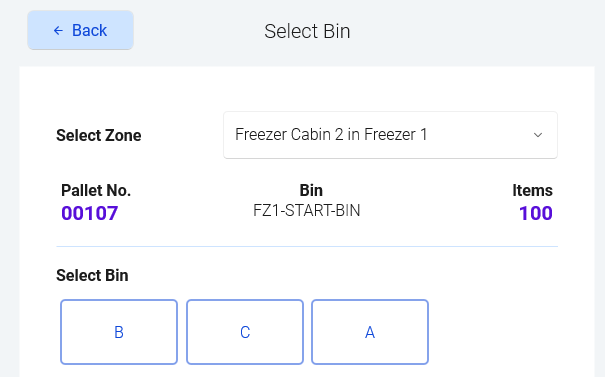
The screen will show where the pallet is currently registered (Zone and Bin) and how many items it has.
-
Select the new Zone and Bin
Next step is to select the new zone, if it needs to be changed. After the zone is selected, the screen will show all available bins. It can look in two different ways-
If the bins are few, they are shown as buttons.
-
If they are many, so the button view would not fit on the screen, there will be a drop-down field for the bin selection:
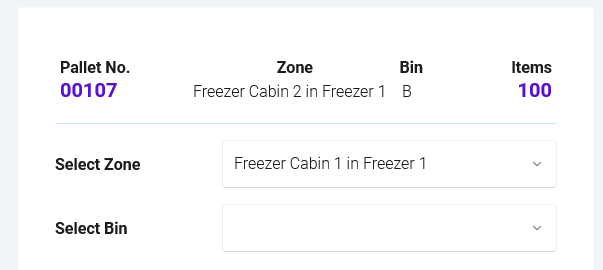
Drop-down for the new bin
-
-
Confirm the new Bin
When bin has been selected, either with a button or drop-down, confirm.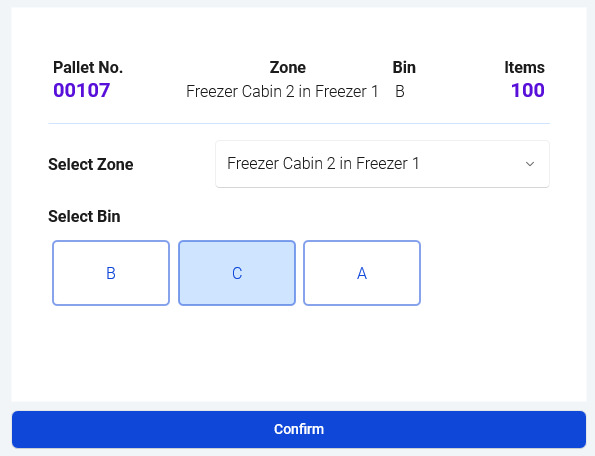
After a successful move, the system will show a message like “Pallet put into bin C”.
The only fields that are updated on the Pallet entry are these:
-
Zone Code
-
Bin Code
Moving two pallets (double forklift)
There is a setting is on the User Profile that controls which screen is used to move a pallet, if this checkmark is one, the functionality will move 2 pallet at a time:

This is a similar move as the one above, but can only be used when 2 pallets are going to be put in two bins that are side by side. This is the case when using a double-forklift that transports 2 pallets at the same time.
-
Scan pallet #1
Scan the pallet barcode (or type it in) and then click the Confirm button.
-
Scan pallet #2
Next, a box will show to enable scanning the second pallet. -
Select the new Zone
Next step is to select the new zone, if it needs to be changed. After the zone is selected, the screen will show all available bins. -
Select bins for both pallets
-
Confirm
Optional Features
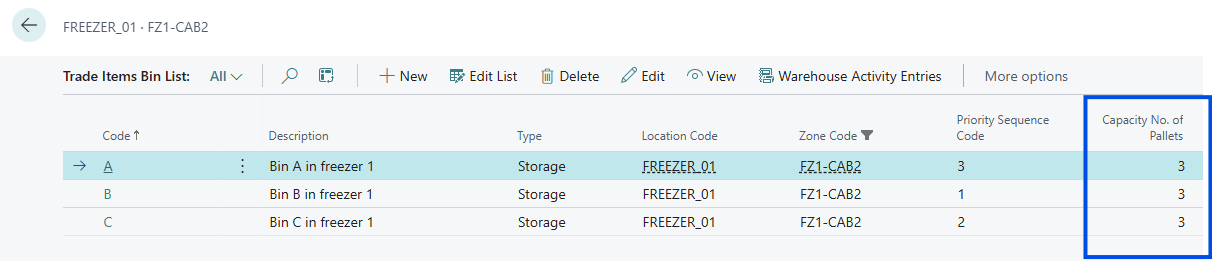
Bin Order
The bins can be ordered in a specific order, according to the Priority Sequence in the bin list.
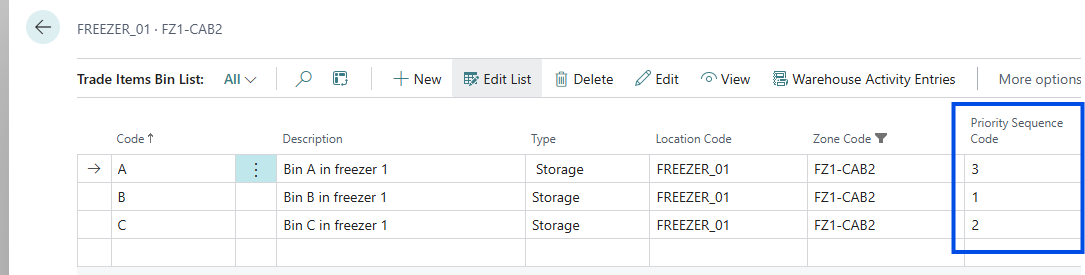
These values will line up the bin buttons in Stream in the following way:
Double barcoded bins
If there is a checkmark in the User Double Barcode for TI Bin Selection on the User Profile, the screens when scanning the bins will change accordingly. One location/warehouse could have this setup, even if another location/warehouse has the single barcoded (normal) bins.
See requirements that must be fulfilled to use this functionality:
Using Stream with Wisefish | Double barcoded Bins
As mentioned in the requirements, the Bin Code will be constructed as [Zone]-[Barcode1]-[Barcode2]
Here is how a pallet is moved, when the bins are barcoded in this way:
-
Scan pallet
Scan the pallet barcode just like normally. -
Select Zone
User must select a Zone (the one used last time is automatically selected).
Once the a Zone has been selected you can see the combined Bin code updated.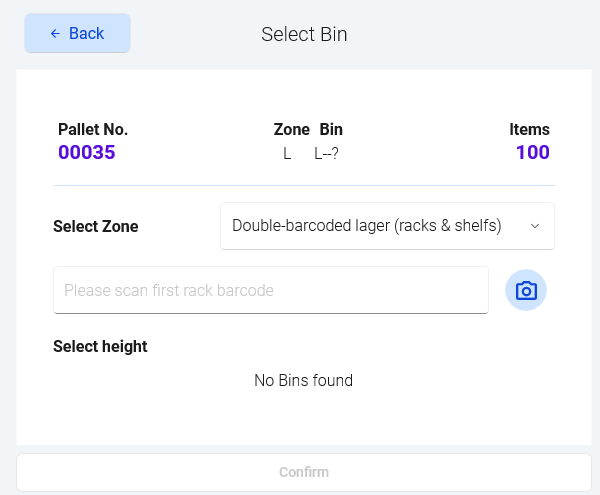
Zone code is “L” and will be the beginning of the Bin code
-
Scan first barcode
Scan first barcode, or put it in manually. It might stand for a rack or aisle. In this example, let’s call it a “rack”.
Again the combined Bin code updates, it now contains info about the Zone and rack.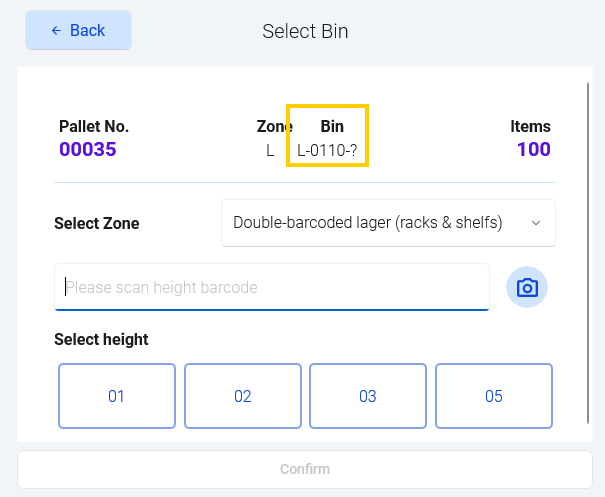
-
Scan the second barcode - for height
If there are no more than 8 height options you will be able to see buttons for the available heights on screen and you have the option to select from there. Else, the barcode can be scanned. Once again, the combined bin code is shown. In this case it is “L-0110-03”.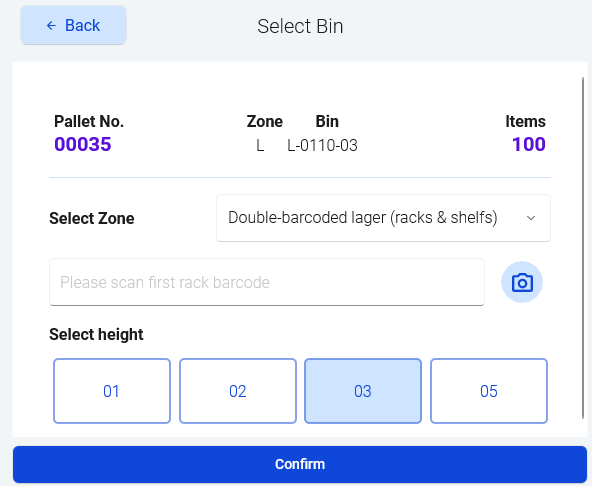
-
Press Confirm and now the pallet can be moved to the specified Bin.
Bin capacity check
On the Wisefish Warehouse setup, there is a checkmark that controls if the capacity check should be done, when pallets are put into bins. When the check-mark is on, pallets cannot put into bins have

The Bins must have the capacity column populated: