
The purpose of this functionality is to modify the amount of Trade Items on the Pallets. This can be about
-
modifying a single pallet, by either adding Trade Items (for example boxes) on it or remove trade items from it
-
moving trade items between two pallets, possibly leaving one of them empty after the modifications
The main steps of the process
-
All the methods start with a single pallet, the first step is to scan the pallet
-
Then select the applicable method, if working with only one pallet, user can add loose, barcoded Trade Items to the pallet or remove Trade Items from the pallet
-
If the purpose is to transfer Trade Items between pallets, the options are
-
move Trade Items from the scanned pallet to another pallet, an existing one or a new one
-
move Trade Items from another pallet onto the scanned pallet
-
in both cases, move the whole pallet, a number of Trade Items, or the lines you pick
-
Table of Contents
Scan pallet and view options
All the methods start with a single pallet.
-
Click Pallet Functionalities in the main menu.
The “Pallet Functionalities” page is displayed.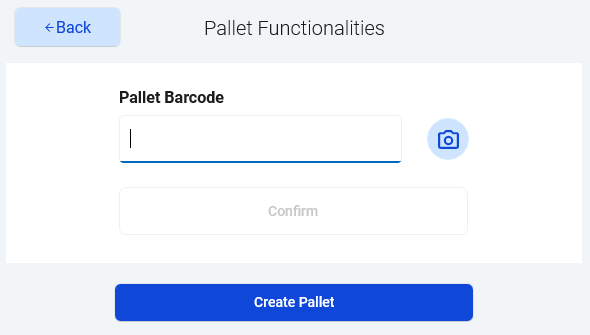
-
On this screen, there are three ways of putting in the barcode:
-
Use a handheld scanner to scan the barcode.
-
Press the input field and manually type the barcode.
-
Press the camera icon and then point the camera towards the barcode.
(This is only possible if there is no barcode scanner connected.)
-
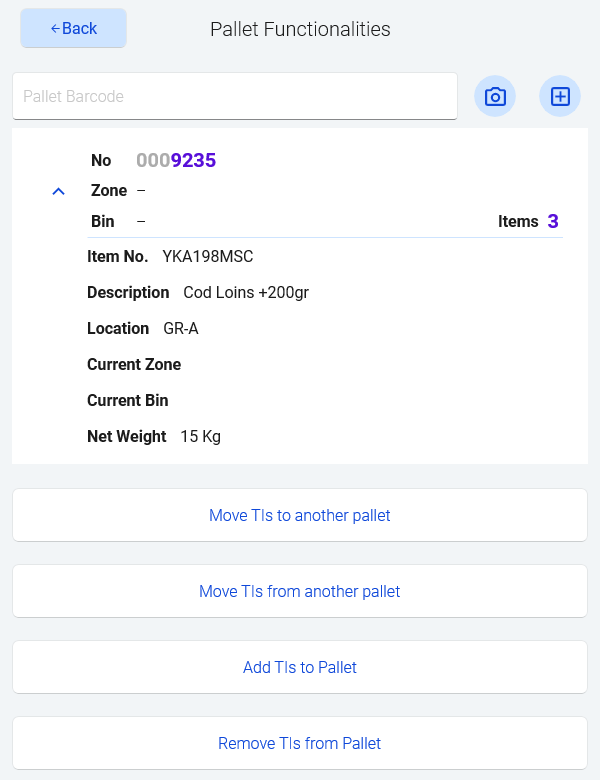
If a valid barcode is used, information about the pallet will be displayed along with the possible functionalities for that pallet. See snapshot to the right.
The functions are Move TIs to another pallet, Move TIs from another pallet, Add TIs to Pallet, Remove TIs from Pallet and Print out Pallet Label. Show more on the pallet card shows the item, location, zone, bin and net weight of the pallet.
The quantity of Items on the Pallet determines which functionality can be performed. For example, on an empty pallet Move TIs to another pallet and Remove TIs from Pallet are not available.
Create a new pallet
To start with a new, empty pallet instead of scanning an existing one:
-
Press Create Pallet on the scan screen, or + next to the pallet barcode field once a pallet is shown.
-
Choose a generated barcode, or scan the existing label of the pallet, and confirm.
An empty pallet is created in BC.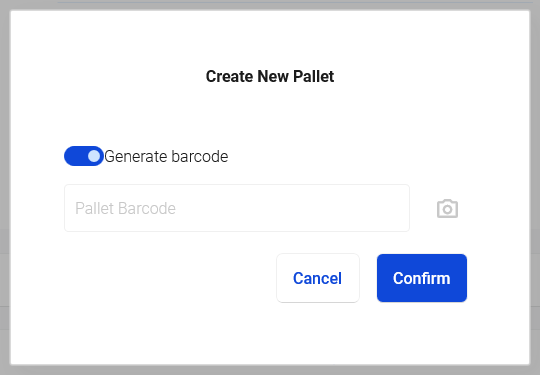
-
The new pallet opens straight away, with no items. Fill it with Add TIs to Pallet (loose boxes) or Move TIs from another pallet. On an empty pallet Move TIs to another pallet and Remove TIs from Pallet are greyed out.
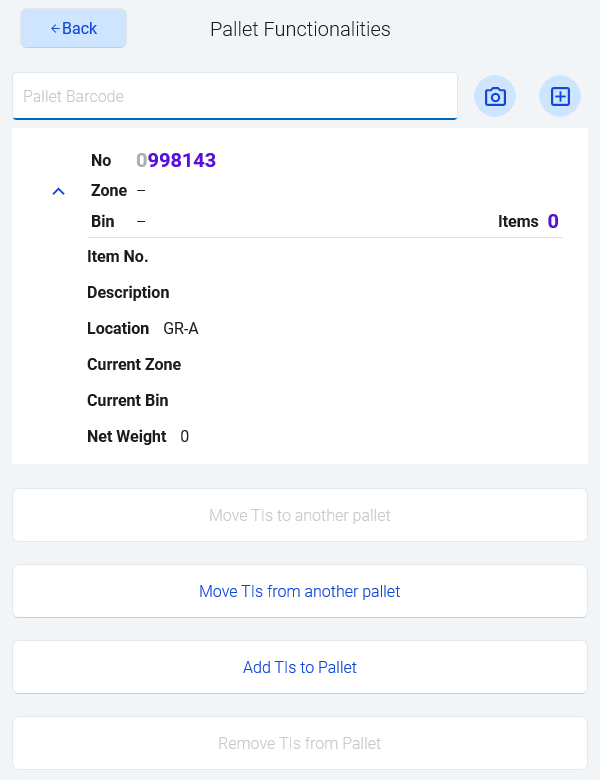
If a scanned pallet barcode does not exist in BC, Stream offers to create the pallet, as long as the barcode is a valid pallet barcode (SSCC). A generated barcode needs an SSCC setup on the stock center.
The guide for each function is below.
Prerequisites
For all pallet modifications the user must have a User Profile that allows pallet modifications. See below, the subchapter Stream - Pallet Management | User Profile Settings
Modifying a single Pallet
Add TIs to Pallet
This function allows the user to add loose Trade Items (boxes that are not on any pallet) to a selected Pallet.
-
Scan the pallet (see chapter above)
-
Click Add TIs to Pallet
Stream shows “Scan loose boxes to add them to … Each box is saved as you scan.” -
Scan the barcode of each loose box.
The box is saved on the pallet at once and shown at the top of the list, with a button to remove it again.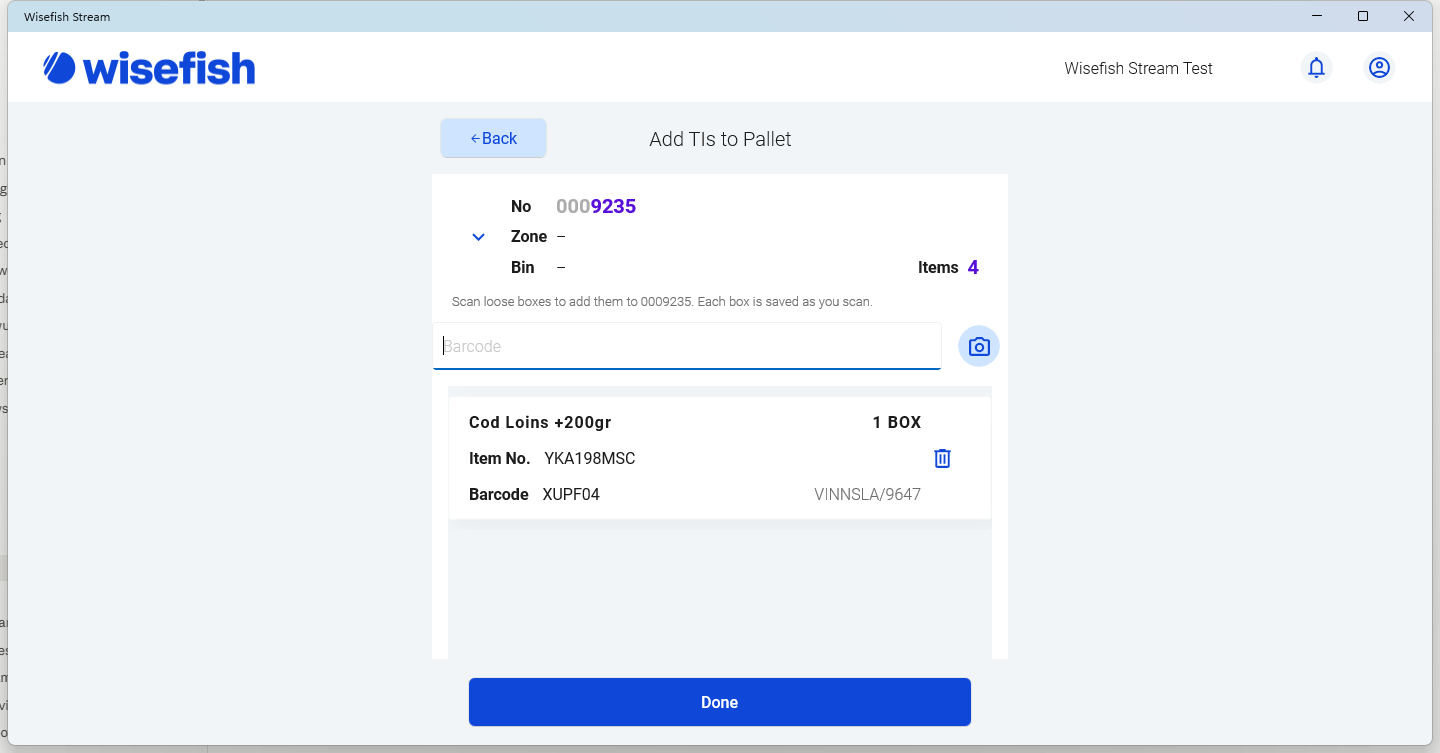
When using this method on the Windows version of Stream, scroll up to make the Barcode field visible. Then the barcode can be typed in.
-
Click Done when finished.
Stream refuses the scan when:
-
the box is on another pallet, or a pallet barcode is scanned: “To take TIs from another pallet, use Move TIs from another pallet.”
-
the box is already on this pallet: “Already on this pallet”
-
the barcode is not known: “No trade items were found for this barcode”
The remove button on a row takes that box off the pallet again. It becomes a loose trade item in the bin.
With a Wisefish Peripherals API older than 28.1.20261023.18, the scanned boxes are instead listed first and saved together when you click Confirm:

The Trade Items have been added on the Pallet and will become visible on the subform of the Pallet card in BC
Prerequisites
There is a Trade Item
-
with a barcode
-
not on any pallet (a loose box). To take boxes from another pallet, use Move TIs from another pallet.
The Pallet…
-
must not be reserved
-
takes other items or lots only if the Pallet Mixing setting on the Item card (Product & WIP > Pallets) allows it. BC checks the item being added and, if its setting is blank, the key item of the pallet. When the setting is blank, other items and lots are accepted; when it is set, BC refuses the box with a message.
Mixed pallets should be avoided when working with Stream.
Remove TIs from Pallet
This function allows the user to remove Trade Items from a Pallet and leave them without a pallet number. The trade items stay in the same zone and bin as loose open trade items, for example on a shelf.
-
Scan the pallet (see chapter above)
-
Click Remove TIs from Pallet
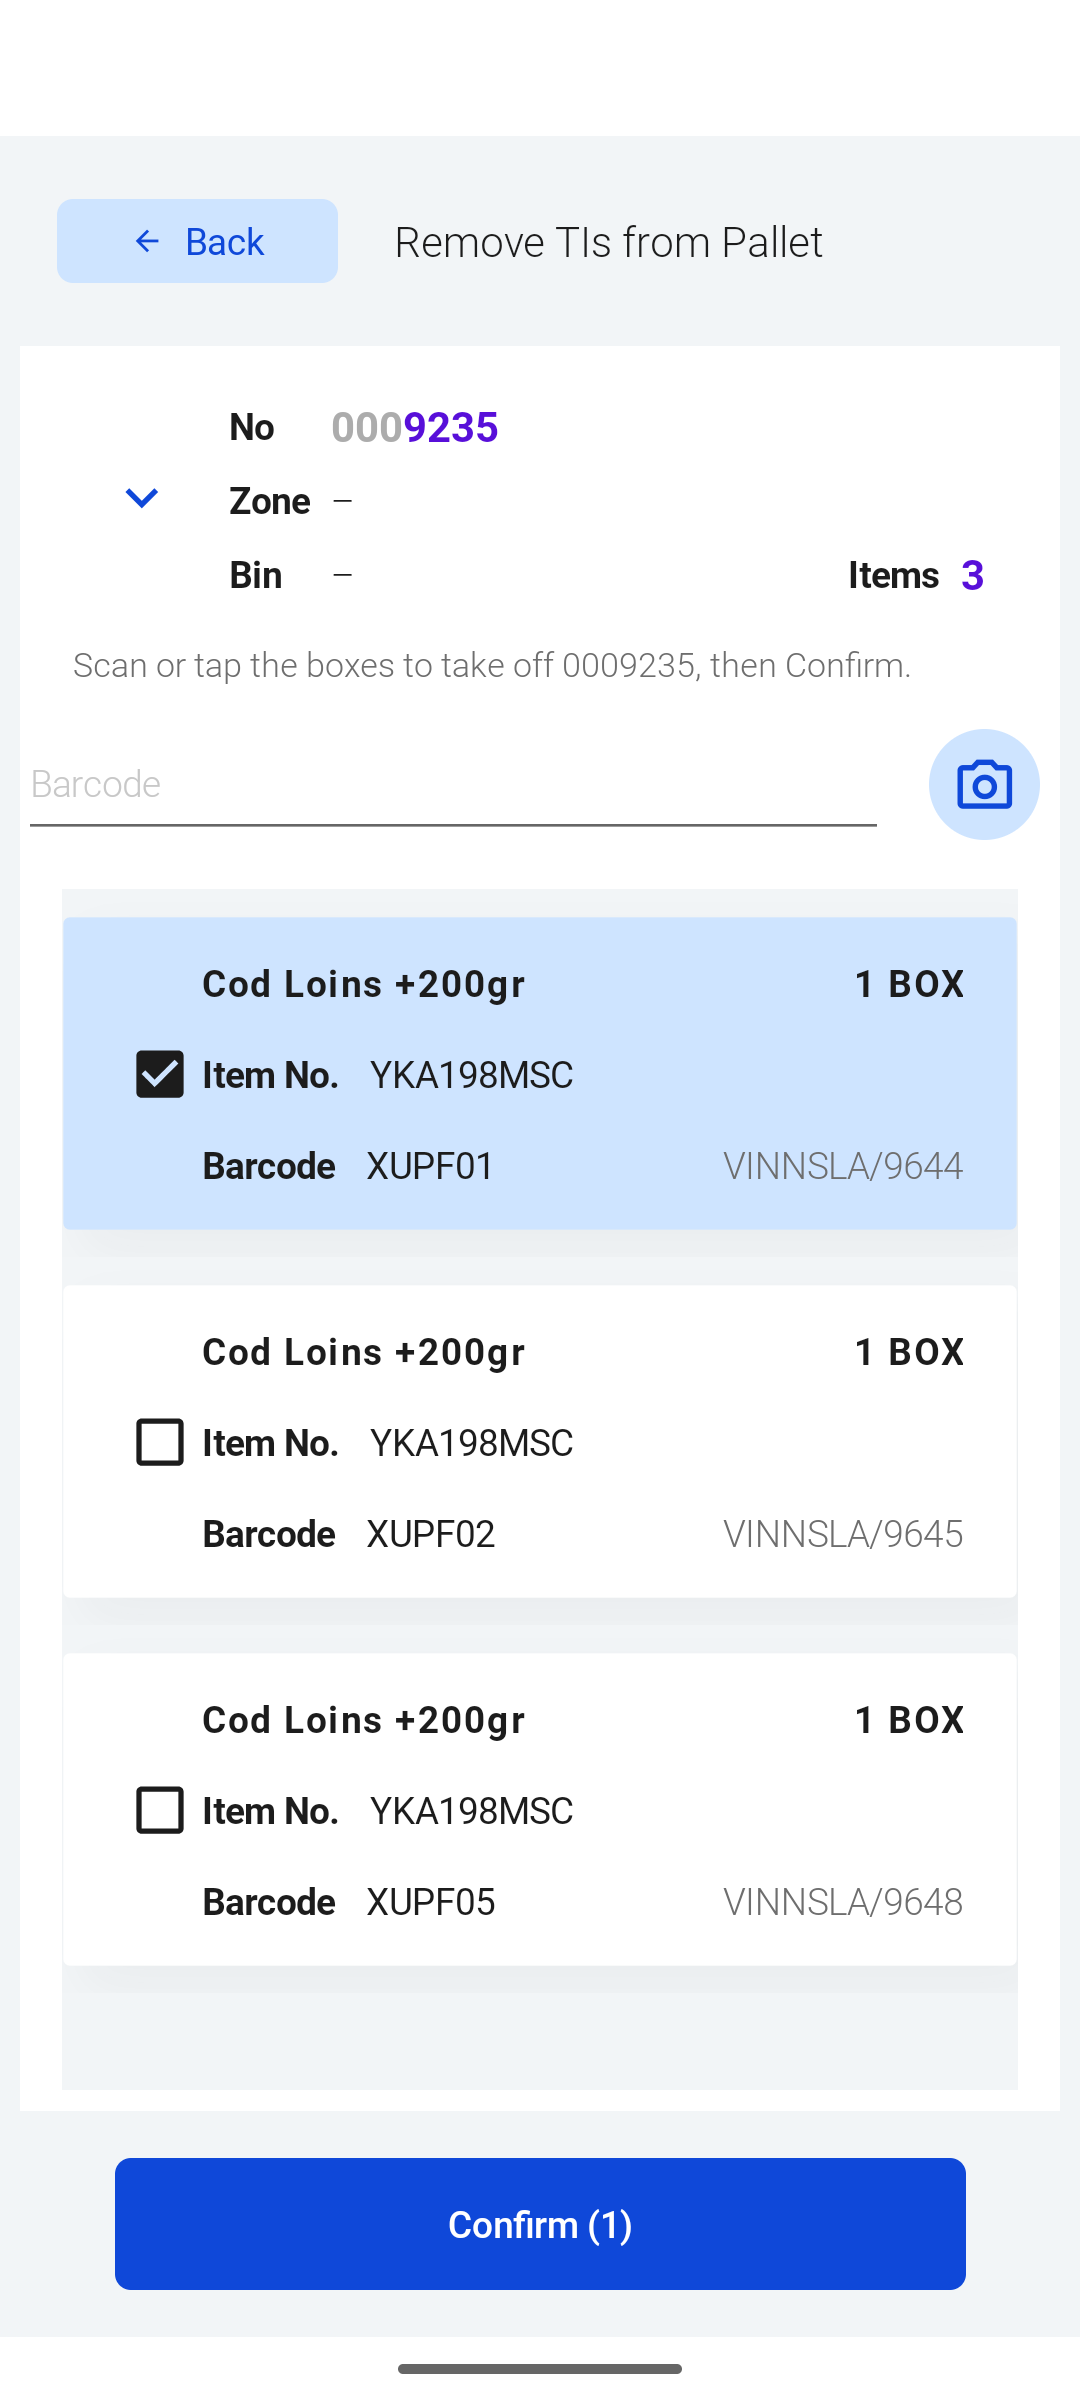
The lines on the pallet are listed, each with a checkbox. -
Select the Trade Items to remove. There are 2 options, either
-
scan the barcode of the Trade Item. Its line is ticked and moves to the top of the list. A box that is not on the pallet gives “Not on pallet …”.
-
or tap the line on the screen to tick it
-
-
Click Confirm
The button shows how many are selected. When done, Stream shows “N TIs removed from pallet …”.
The Open Trade Item will now have the Pallet Barcode field empty.
Prerequisites
The Pallet…
-
must not be reserved
-
has Trade Items on it. Boxes without a barcode of their own cannot be scanned, but they can be tapped in the list.
Modifying two pallets
Move TIs to another pallet
This function moves Trade Items from the scanned pallet to another pallet, either an existing pallet or a new one.
-
Scan the pallet that has the Trade Items (see chapter above)
-
Click Move TIs to another pallet
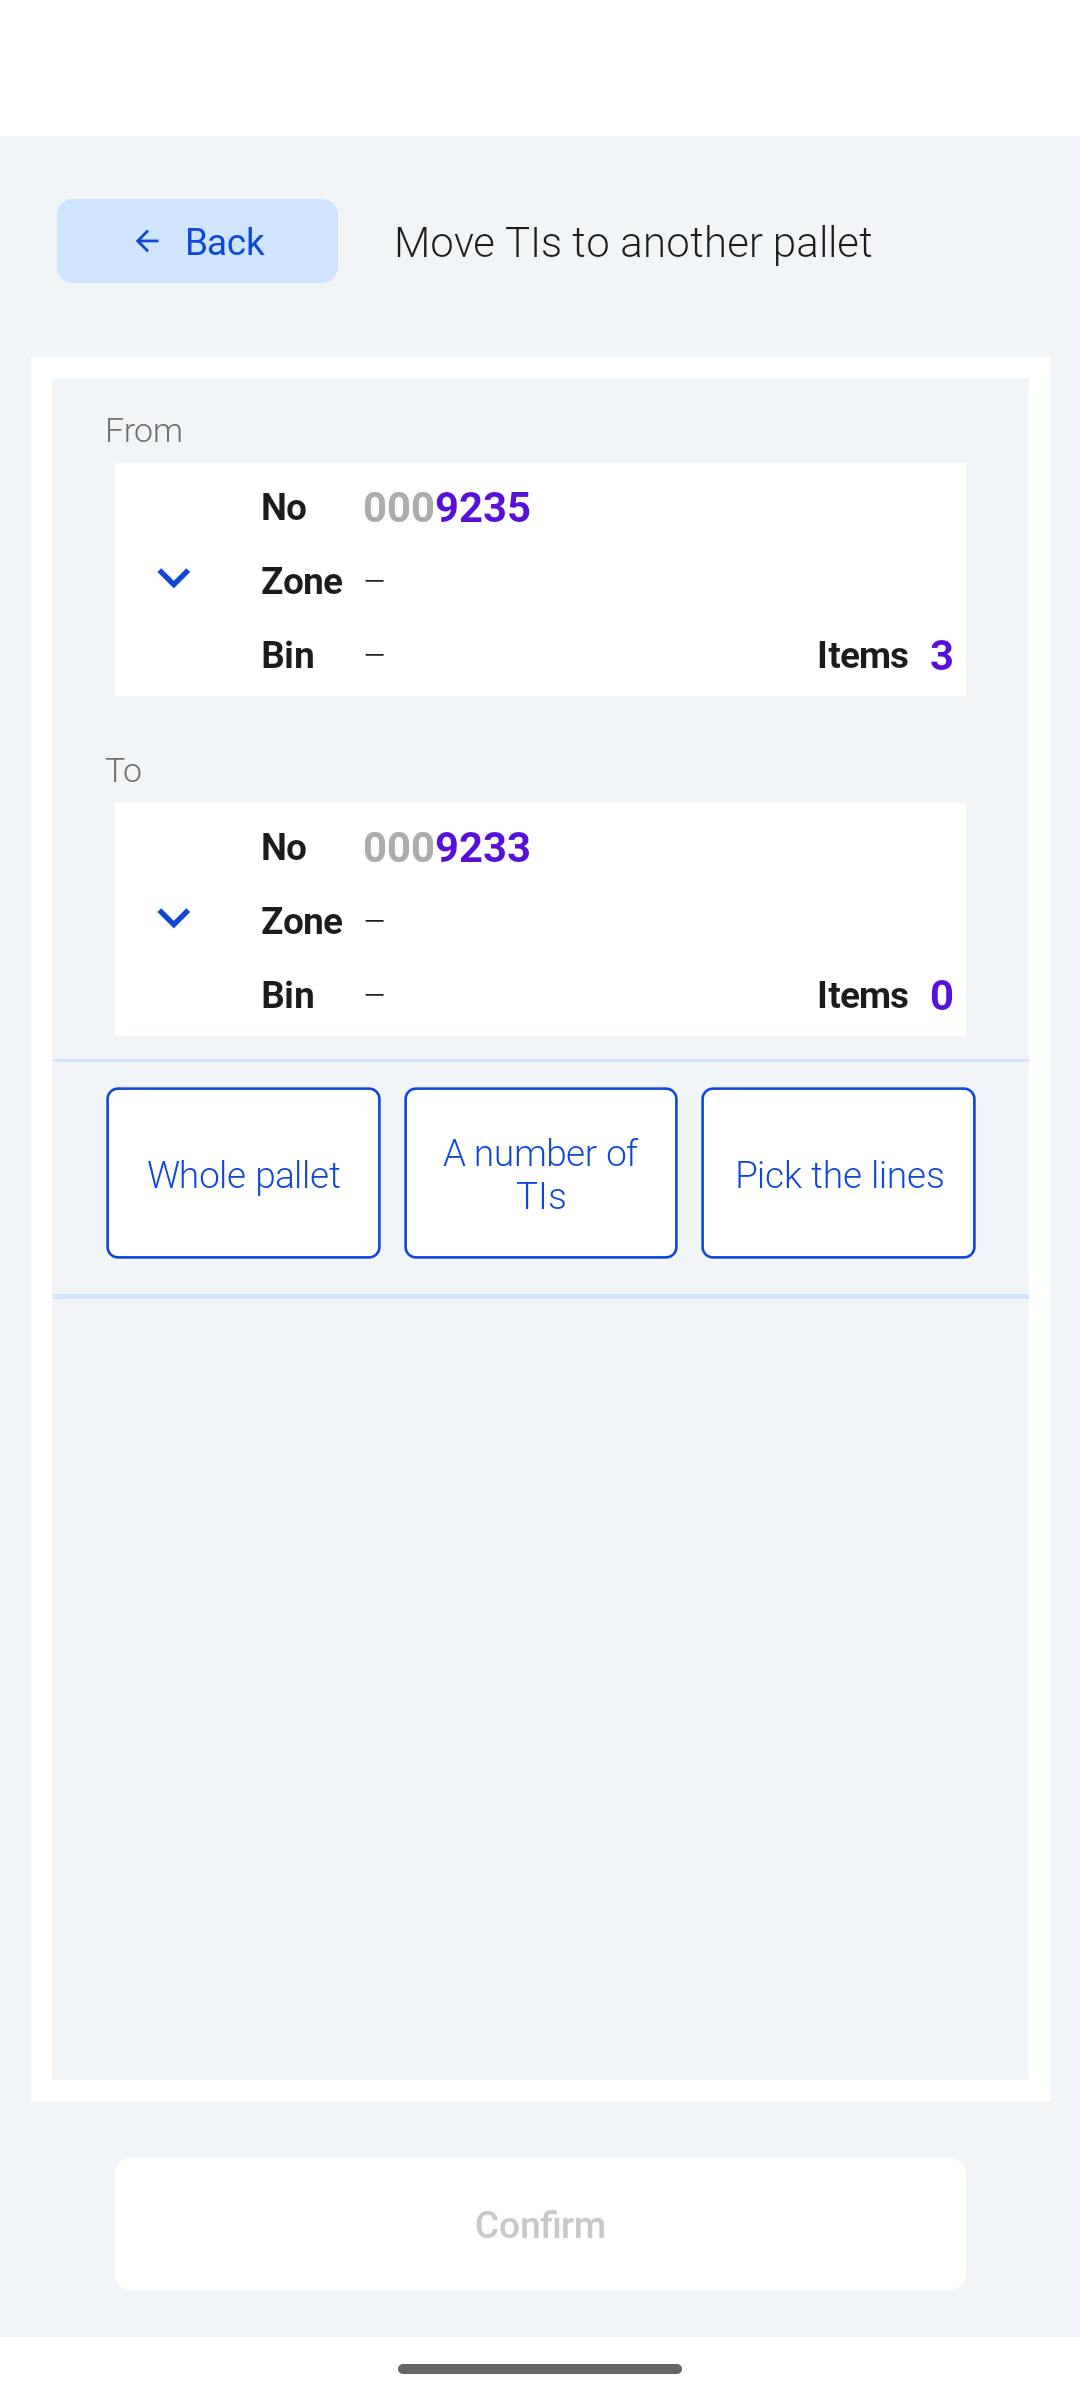
The pallet is shown, marked From.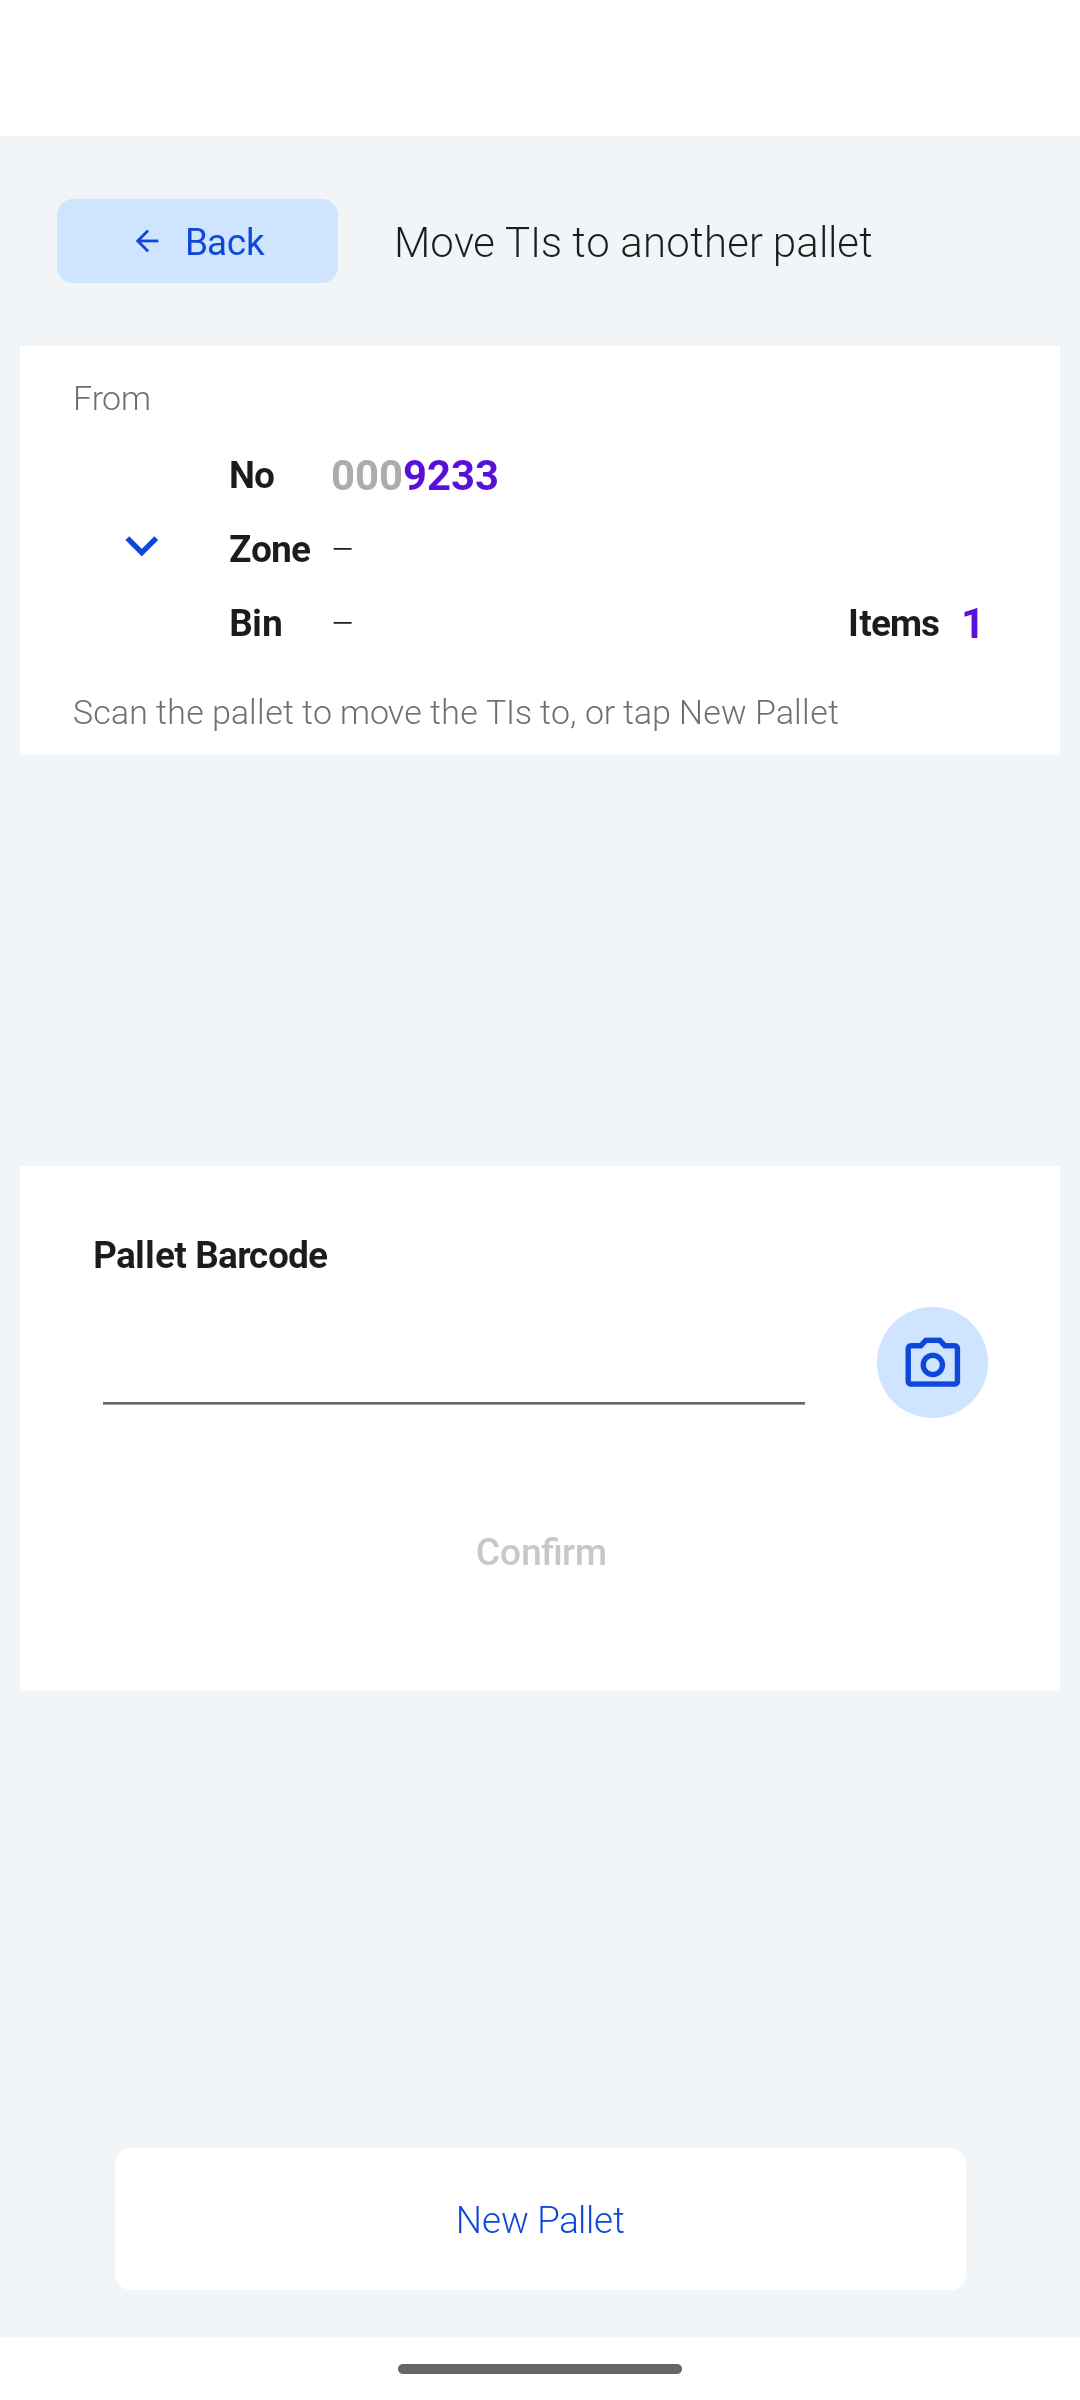
-
Scan the second pallet, or type it in manually or use the camera. To move the Trade Items to a new pallet, press New Pallet instead.
The same pallet cannot be scanned as the second pallet. -
Both pallets are shown, marked From and To, with three choices. Nothing is chosen at first, and Confirm stays off until you choose:
-
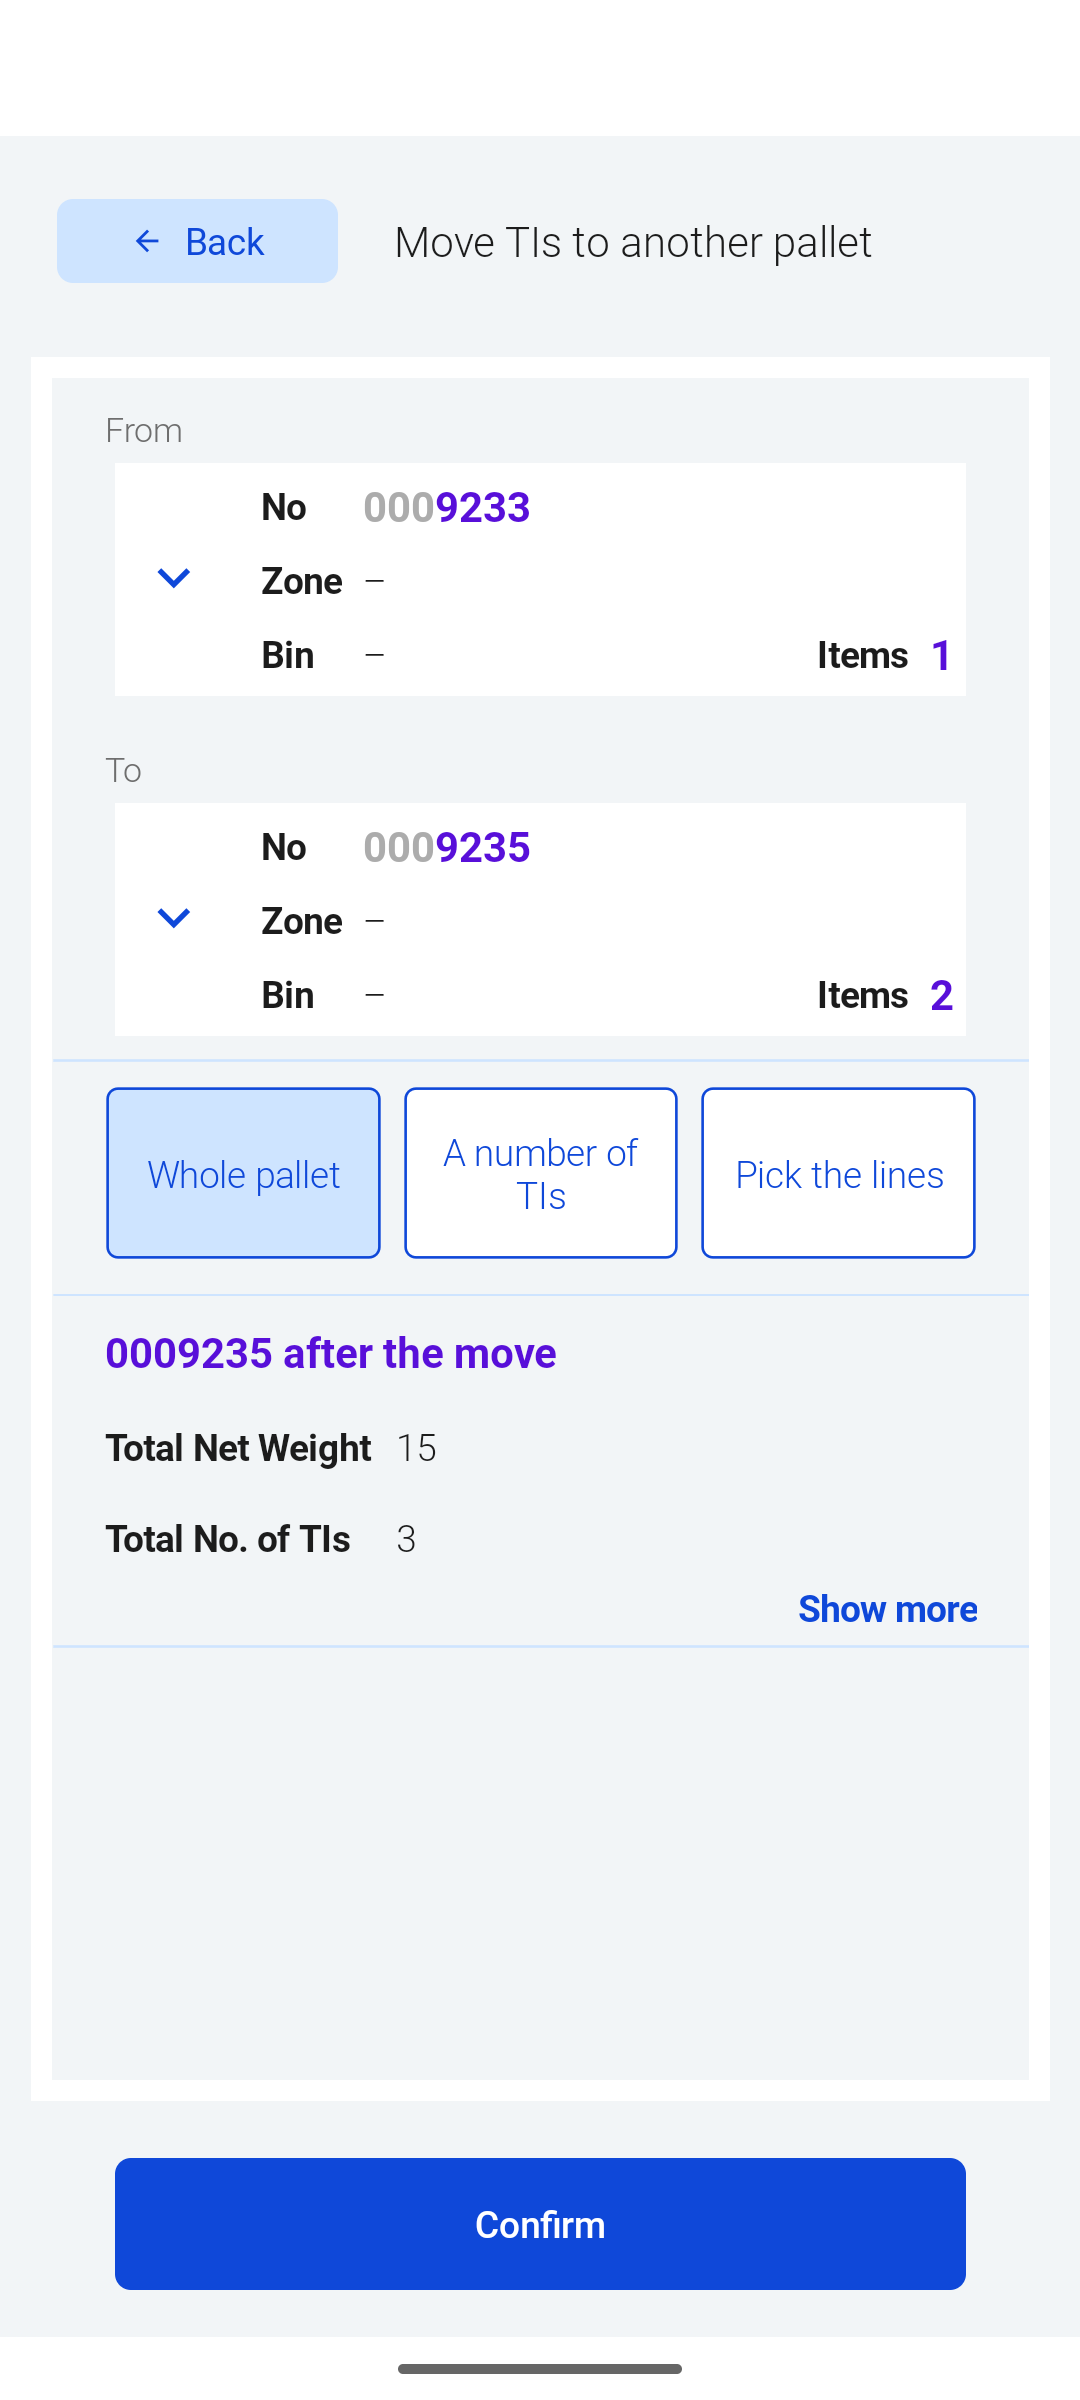
Whole pallet: all the Trade Items are moved. The preview shows the other pallet after the move, with its total net weight and number of TIs.
-
A number of TIs: enter a whole number from 1 to the number of TIs on the pallet, or use - and +.
-
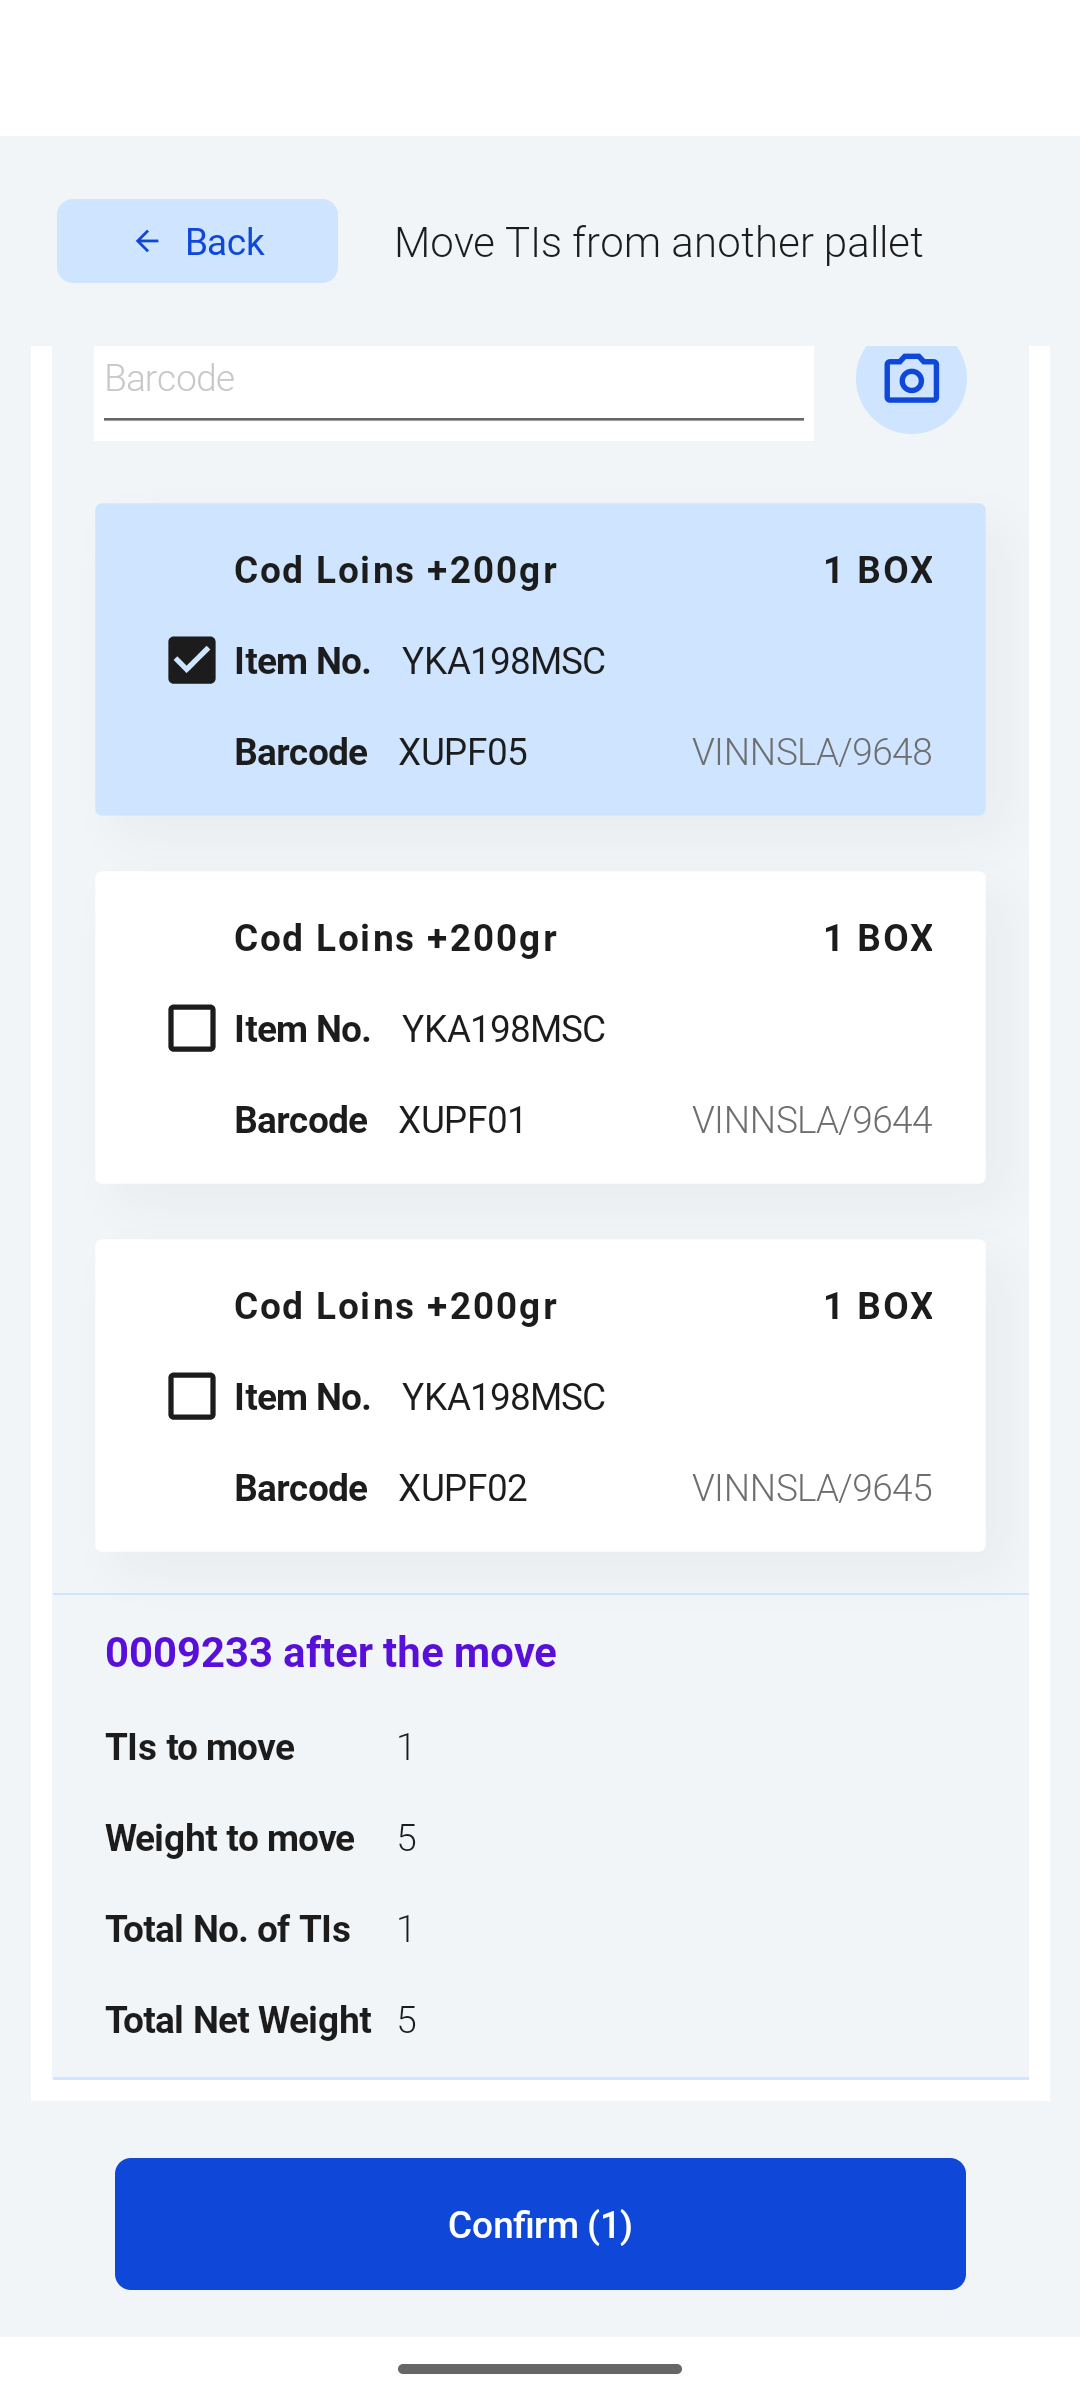
Pick the lines (Wisefish Peripherals API 28.1.20261023.18 or later): tap the lines to move, or scan a box to tick its line. A scanned line moves to the top. A line can hold several boxes; the whole line is moved. Confirm shows how many lines are picked, and the preview shows the weight to move.
-
-
Click Confirm
Stream shows “N TIs moved to pallet …” and returns to the first pallet, with its new number of items.
The second Pallet now has the moved Trade Items, and the first pallet has fewer.
With Whole pallet or A number of TIs, each pallet gets the status Empty, Open or Full, depending on how many Trade Items it holds.
A new pallet is created in BC with a new barcode, on the same stock center and location as the first pallet.
If BC refuses one of the picked lines, that line stays on the first pallet and the move stops. The message shows the reason from BC and how many lines were moved.
If a picked box was moved from another device in the meantime, Stream says “… is no longer on pallet … Nothing was moved. The screen has been refreshed.”
Prerequisites
Both pallets may not be reserved. If a move is refused because a pallet is reserved, unreserve the pallet in BC first.
The pallet that receives the Trade Items must have space for them, i.e. not be Full.
The Pallet Mixing setting on the item decides whether other items or lots may be put on the same pallet.
To move to a new pallet, the stock center needs an SSCC setup, so that a pallet barcode can be generated.
Move TIs from another pallet
This function works the other way round: the scanned pallet is the one that receives the Trade Items.
-
Scan the pallet that should receive the Trade Items (see chapter above)
-
Click Move TIs from another pallet
The pallet is shown, marked To.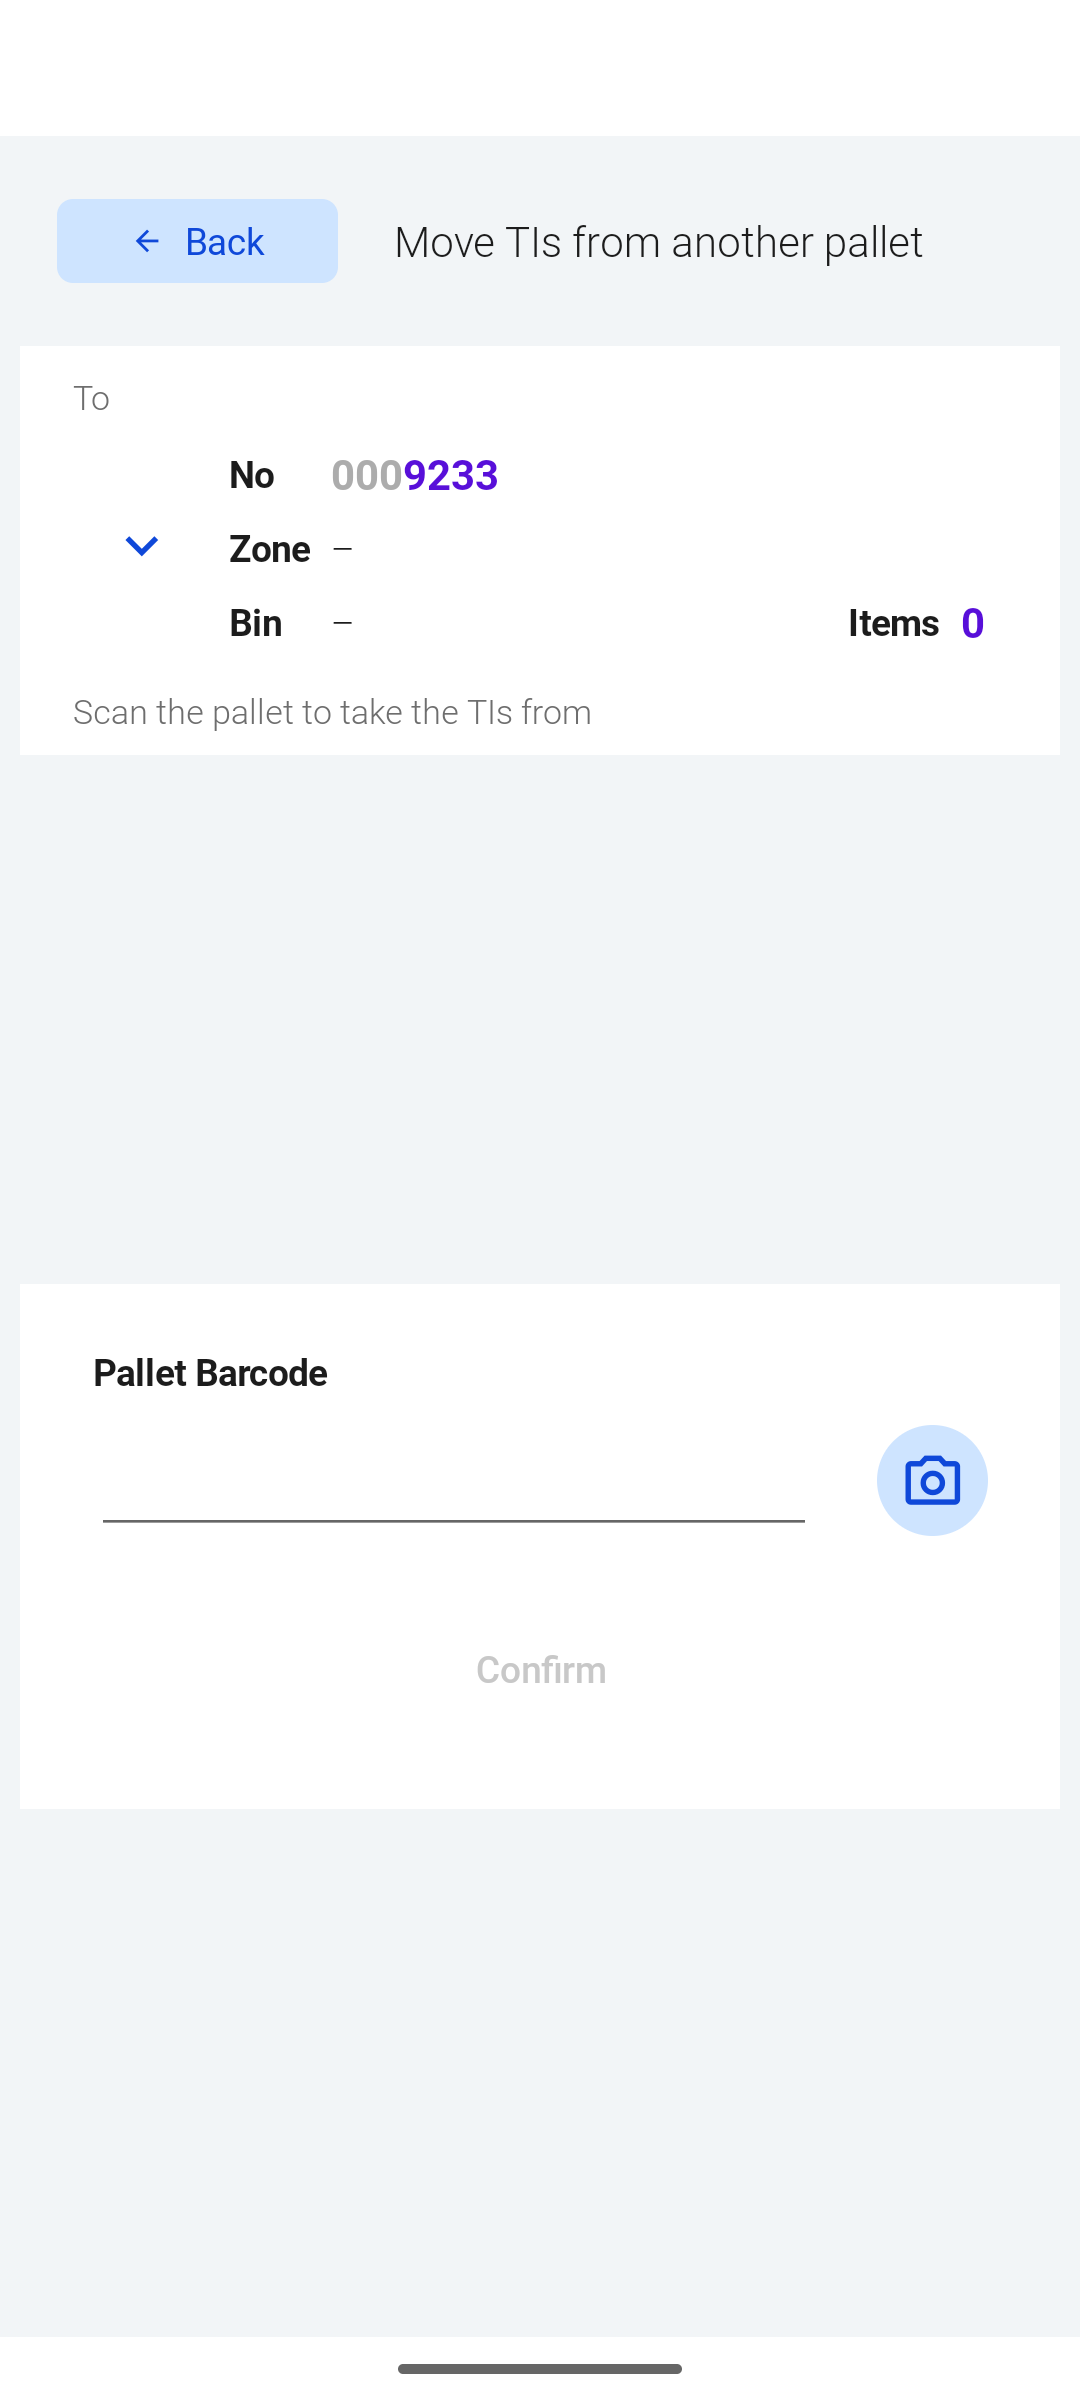
-
Scan the pallet to take the Trade Items from, or type it in manually or use the camera. An empty pallet is refused.
-
Choose Whole pallet, A number of TIs or Pick the lines, as described above.
-
Click Confirm
There is no New Pallet option here. To move Trade Items to a new pallet, use Move TIs to another pallet from the pallet that has them, or create the new pallet first with +.
Prerequisites
Both pallets may not be reserved. If a move is refused because a pallet is reserved, unreserve the pallet in BC first.
The pallet that receives the Trade Items must have space for them, i.e. not be Full.
The Pallet Mixing setting on the item decides whether other items or lots may be put on the same pallet.
User Profile Settings
On the User Profile, these fields control if user is allowed to add items to an open pallet and remove items from a pallet.
The Pallet Management setting in the Operation Setup on the User Profile shows the Pallet Functionalities function in the main menu.

Here is an overview of which settings are required for each method:
|
Function |
Required settings |
|
|---|---|---|
|
|
Add to Open Pallet |
Splitting off a Pallet |
|
Add TIs to Pallet |
True |
|
|
Remove TIs from Pallet |
|
Allowed |
|
Move TIs to another pallet |
True (when moving to an existing pallet) |
Allowed |
|
Move TIs from another pallet |
True |
Allowed |
Stream shows all the functions for the scanned pallet. BC checks these settings when a function is used and refuses it if the setting is missing.