
This is a step by step guide for picking pallets with Stream to use Production Agreements. In this case, the pallets contain the raw material or WIP trade items that will be posted as consumption for the production.
Similar as in Business Central, this process covers the following transactions:
-
Reserving pallets for production agreements, if not already pre-reserved
-
Picking the pallets from the storage bins and moving them to the production area
-
Set the Picking Status of the agreements to “Picking finished”
After this process, the consumption is ready to be posted within BC.
Table of Contents
Introduction
This chapter is about the Stream interface for handling the warehouse process of the Wisefish document called Production Agreement. Production Agreements are used for posting output (positive inventory transactions) to create the produced Trade Items - and to post the consumption (negative inventory transactions) for the consumed Trade Items.
Recommended setup in Business Central is described in this page: Business Central Settings
In order to use the Production module in Stream, there are various data and settings that must be available.
Production Agreements
The fields on Production Agreements that control which of them can be handled in Stream are the following:
-
Status must be either Open or Released in order to handle the agreement in Stream.
-
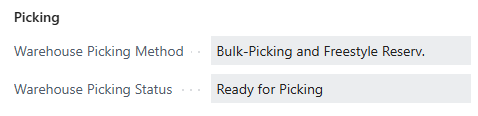
For the Production Agreement to appear in Stream, first the Placed into Picking action must be run. It changes the Warehouse Picking Status to Ready for Picking.
Picking Methods
There are 2 different picking methods possible in Stream.
-
Freestyle : No specific pallets have been reserved on the agreement, but before pick, Stream will show the possible pallets as “Available” pallets for the warehouse worker doing the pick from the storage bins. This picking method has a longer name in BC, it is called “Bulk-Picking and Freestyle Reserv.”, but it is the same.
-
Pre-reserved : The pallets to be picked, are selected and pre-reserved within BC before sending the agreement into Stream. Then, these pallets are shown on the “Reserved” tab in Stream.
Trade Items and Pallets
Trade Items must be available in stock, and they must be kept on pallets. Pallets are always identified with a unique barcode which must be of type SSCS.
-
The pallets can neither be reserved for some other process, nor on hold.
-
They must be on the same Location Code as the warehouse workers' user profile.
-
Stock Center Code on pallets and production agreement must match.
Production Bin on User Profile
After picking for Production Agreements, the pallets are moved to the Bin that is defined as Picked for Prod. Bin on the User Profile of the logged in user.
How to set this up in BC:
-
Create the Bin, and connect it to the correct Location Code.
-
Create a User Profile, or use an existing one. Attach this bin to that User Profile.
-
Set this profile on the users, in table User Setup.

The screens in Stream
Production List
To view all the all the production agreements that are to be handled in the warehouse, open the Production module from the main menu. A page is shown containing all the agreements. These documents have…
-
same Location Code as the user logged into Stream.
-
Status = Released or Open, because posted documents are not shown in Stream.
-
Picking Status is either Ready for Picking or Picking in Process.
When picking is finished, the agreement will disappear from this list.
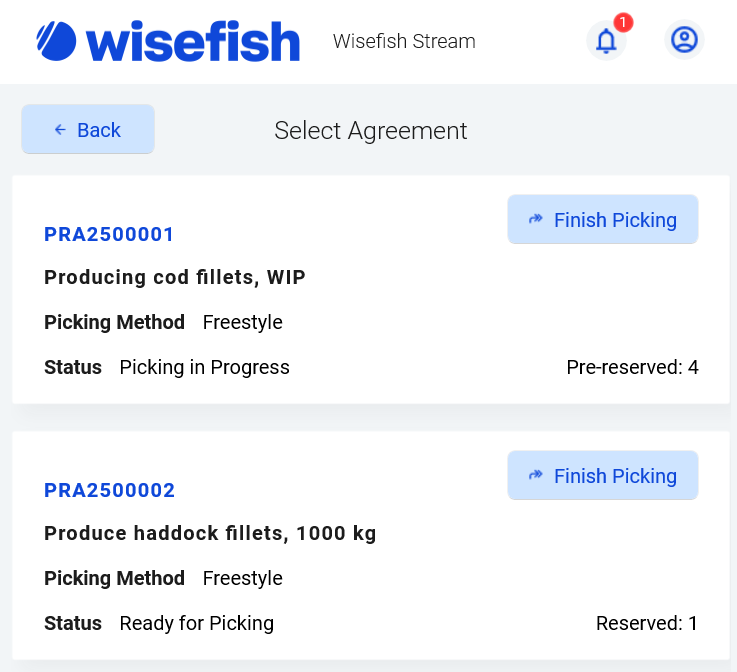
For each agreement, info is shown such as:
-
Agreement No.
-
Description
-
The Picking Method is either Freestyle or Pre-reserved
-
Status is the status according to the warehouse process, i.e. Ready for Picking or Picking in Process.
-
Bottom right corner show info about the number of pallets reserved or picked.
Next step → Click on the tile for a selected document to go to the Production details.
Production details (Scan Barcode)
This is the main screen of the process. It is titled “Scan Barcode” because it is the screen visible when scanning the pallets.
The screen has these components:
-
Agreement No. and the Description is shown at the top to make it clear which production the user is working on.
-
Summary
First tab is the Summary and is always visible, for both types of picking. These are simply the lines on the Production Agreement, as they were created in Business Central. Information for each line:-
Item description, for the item to be produced
-
Quantity to be produced
-
Lot No. is only filled out if a specific lot should be delivered.
-
The Raw Material Item No. - if it has been linked to the item to be produced.
-
Description of the raw material
-
The bottom right corner shows picking information, how many pallets are to be picked, or already picked.
-
-
Reserved
The middle tab is called “Reserved” and is only visible if the Picking Method is Pre-reserved. Then the warehouse worker should only pick pallets from this list. This list shows only pallets that were pre-reserved in Business Central. -
Available
The middle tab will change to “Available”, in the case where the agreement has the Freestyle picking method. -
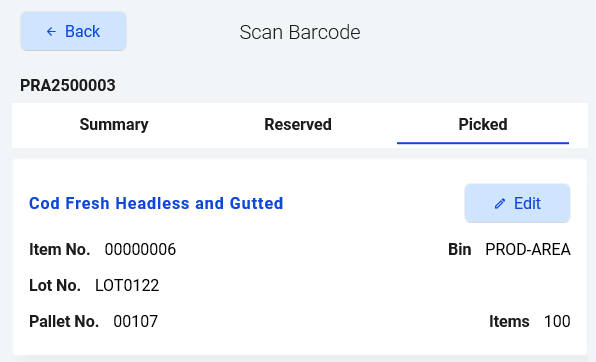
Picked
For both picking methods, this tab will only show pallets that have already been picked. -
Pallet Barcode (scanning field)
On Windows app on laptop, user needs to scroll down to make the Pallet Barcode visible. This field is used to put in a barcode manually if a scanner is not connected.

Note: The middle tab depends on the Picking Method. If it is “Freestyle”, this screen will be called “Available”, else it is called “Reserved” and pallets must be pre-reserved before picking.
The scanner will work no matter of which tab is active. It works in the same way as if the barcode is typed into the Pallet Barcode field.
Step 1 - Picking Pallets
The warehouse worker picks the pallets from the Storage bins and transfers them to the area where they will later be used for consumption for the production.
Picking Method is Pre-Reserved
-
Select the Agreement
from the list, to open up the details page (Scan Barcode):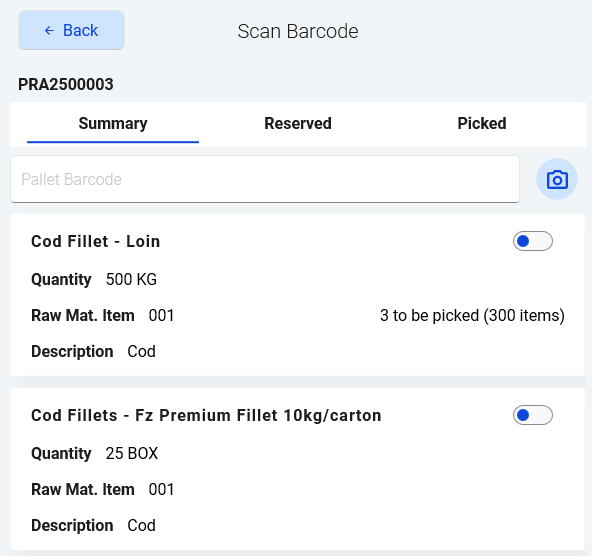
-
Pick a pallet
There are several ways to insert the pallet barcode into the application:-
Scanning: Scan the barcode with a scanner
-
On screen: The Reserved tab has been populated with the pre-reserved pallets. Find the pallet on the list and click on Pick.
-
With a camera: Press the camera icon, in order to use the camera on the phone/pad to scan the barcode. (Camera only works if no Scanner is connected to the device)
-
In Windows app: Scroll up to reveal the input field (Pallet Barcode) to manually type in a barcode. (See red marks on snapshot). Finish by clicking “Enter” on the keyboard.
-
-
Click Confirm
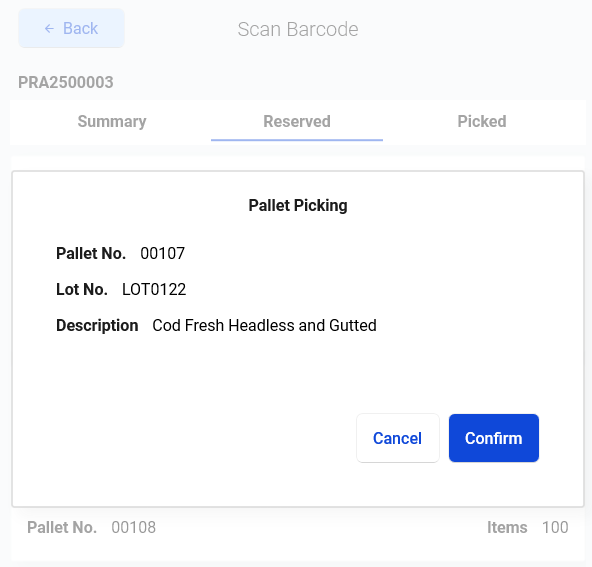
If the operation was not completed for some reason a descriptive error message should appear.
After a successful pick:
-
Pallet goes from the Reserved tab and over to the Picked tab
These changes have been done in Business Central:
-
The pallet now has Picking Status = Finished.
-
Pallet has been moved to the production area bin

Trouble-shooting Tip:
If the name of the middle tab is “Reserved” for the inside warehouse worker, but list is blank, it is because the agreement has Picking Method = Pre-reserved, but no pallets have been reserved in Business Central.
Picking Method is Freestyle
-
Select the Agreement
from the list, to open up the details page (Scan Barcode).
-
Pick a pallet
There are several ways to insert the pallet barcode into the application:-
Scanning: Scan the barcode with a scanner
-
On screen: The Available list is populated with pallets with the correct raw material item number. Find the pallet on the list and click on Pick.
-
With a camera: Press the camera icon, in order to use the camera on the phone/pad to scan the barcode. (Camera only works if no Scanner is connected to the device)
-
In Windows app: Scroll up to reveal the input field (Pallet Barcode) to manually type in a barcode. (See red marks on snapshot). Finish by clicking “Enter” on the keyboard.
-
-
Click Confirm
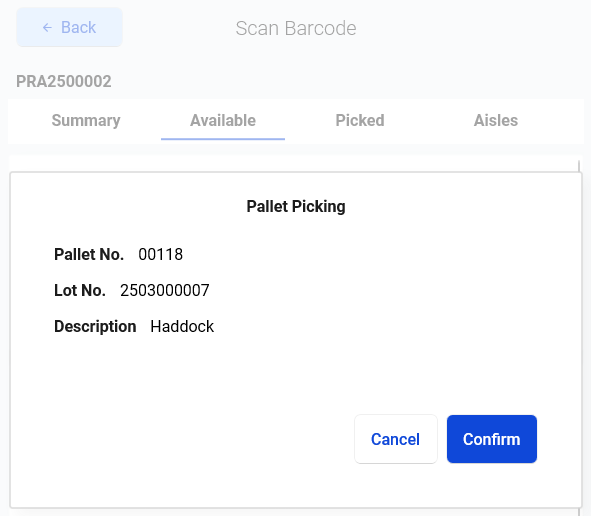
Stream will return an error if the selected pallet does not fit for the production. Is this true?
After a successful pick:
-
Pallet moves from the Available tab and over to the Picked list
These changes have been done in Business Central:
-
The pallet is now reserved on this agreement. This can be seen on the Agreement in BC in field “No. of Pallets Reserved”
-
The pallet now has Picking Status = Finished.
-
Pallet has been moved to the production area bin

How is the Available list populated?
-
The list shows pallet that have items that fit with the Raw Mat. Item No. and on the production lines.
-
It stops collecting pallets if they are more than 100.
-
The list will not show all pallets in the warehouse, it will suggest a few that will fulfill the required quantity from the agreement line.
-
Oldest pallets are shown first, i.e. according to Expiration Date.
Even if a pallet is not shown in the Available list, it does not mean that it cannot be used for the production. Just try to scan it in, or type in the barcode, and Stream will tell if it fits for the production. The allocation process checks if the Key Item No. on the item fits the Raw Material No. for the production line.
Cancel a pick
If the inside warehouse worker needs to cancel the pick already done, it is done like this:
-
Find the pallet in the Picked list
-
Click Edit button
-
Click on the link button in bottom left corner.
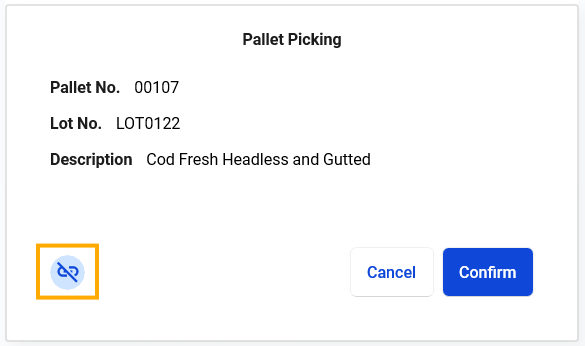
-
Confirm the pop-up question
-
The pallet picked becomes available for selection again, in the middle tab, either as Reserved or Available (depends on Picking Method).
-
The pallet is still in the production bin, like other picked pallets, it does not end on it’s original bin automatically.
→ Next step would be to use the Move Pallet function to keep track of where the pallet was placed.
Step 2 - Finish Picking
When all pallets have been fully picked, the last feature to use in Stream, is finish the pick.
From the list of shipments…
-
Find the shipment
-
Click Finish Picking
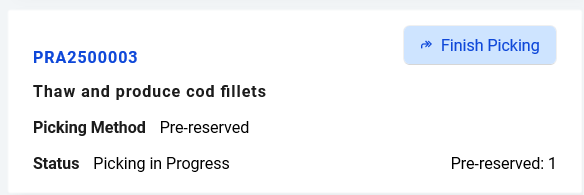
The button to finish picking
-
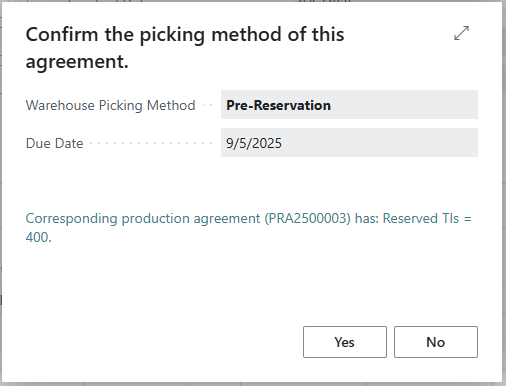
A pop up appears with info about how many have been picked.
-
Then Confirm if everything is all right.
-
The Warehouse Picking Status changes from Process for Picking to Picking Finished
-
The production agreement is no longer visible in the Stream application.
→ Next step would be to post the consumption within Business Central.
Document History
|
Date |
Writer |
Notes |
|---|---|---|
|
Bjartey Sigurðardóttir |
Start this document |
|
|
|
|
|
|
|
|
|