
Before fetching invoices from fish markets, the following configurations must be completed.
The same setup applies to both the purchase and sales processes unless otherwise specified.
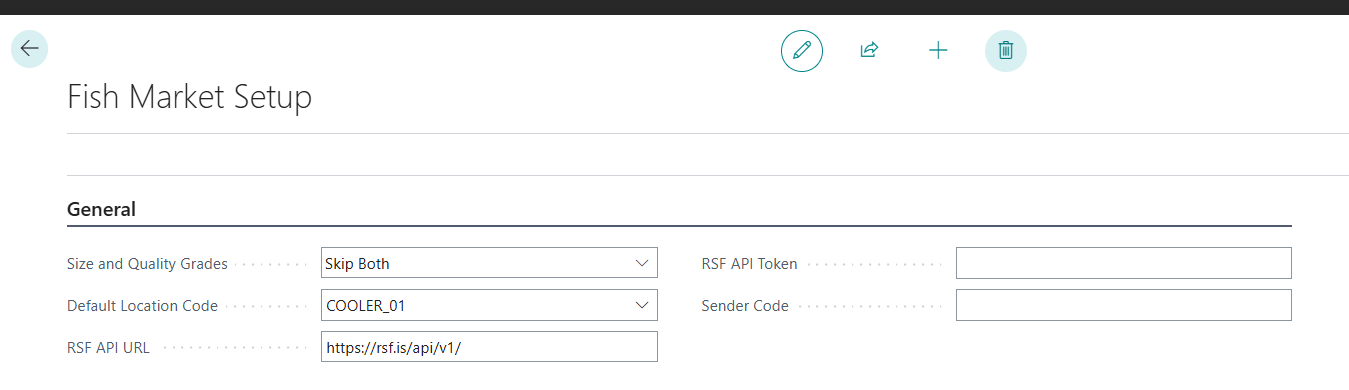
Fish Market Setup
In the Fish Market Setup window, under the General tab, configure the following fields:
-
Default Location Code - This specifies the default location when purchasing raw materials from fish markets. The location is applied to created Receipt Agreements.
-
Size and Quality Grades - By default, the system attempts to retrieve the size and quality grades from incoming messages. Users can choose to skip importing size, quality, or both.
-
RSF API URL - Is always https://rsf.is/api/v1/
-
RSF API Token - retrieved from the settings page on the RSF website. Be sure to be logged in and then go to settings. The token can be found under Token for API tab on the settings page.
Fishing Trip Data Warping
The table controls the mapping of information between systems for labeling raw materials, that is: item numbers, landing harbors, fishing equipment, condition, size, quality, etc.
Error handling after setup
When fetching the first invoices, users may encounter errors related to the Warping Setup.
If the error messages reference unknown codes, download the corresponding XML file to identify the missing mapping.
Reviewing the XML file helps pinpoint the unmapped codes.
All valid IDs and codes are documented in RSF official API documentation: https://rsf.is/api
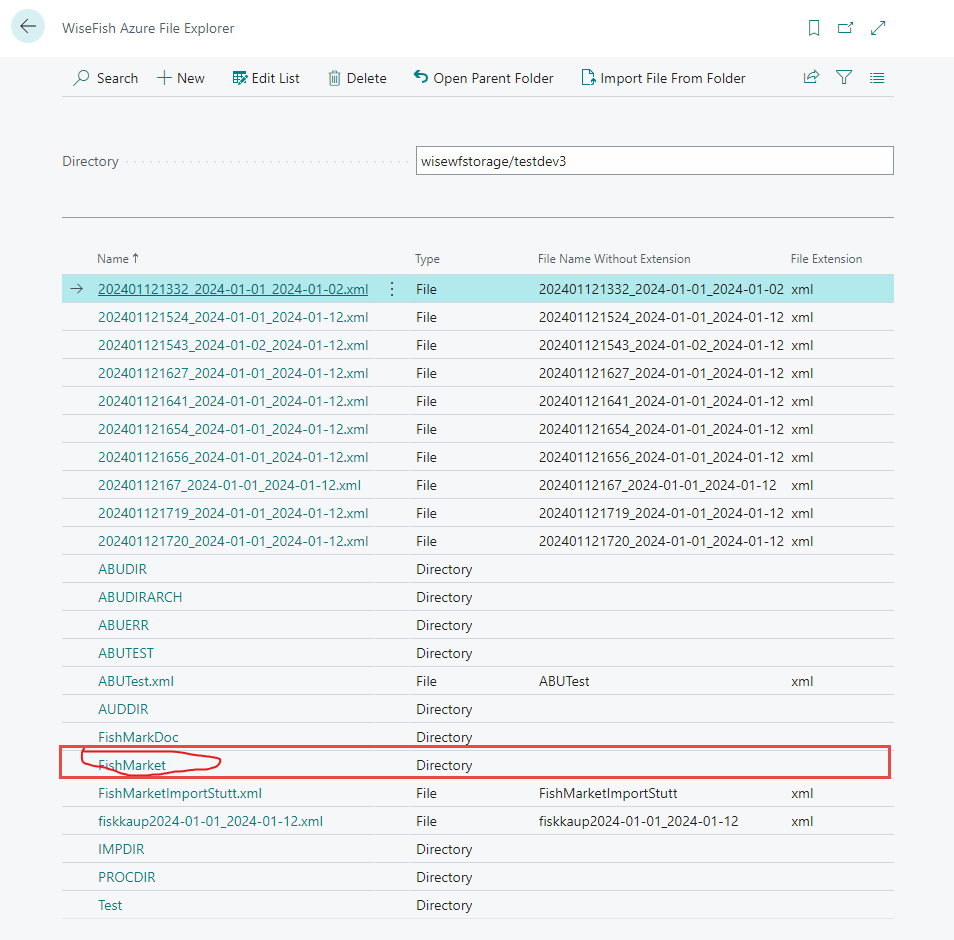
(Optional) Storing XML files in an Azure file
If desired, users can store XML files from fish market APIs in an Azure file share.
To configure Azure file storage:
-
Go to Wisefish setup Configuration and set File Setup to Azure File.
-
Create a new storage account or select an existing one from the Wisefish Azure File Shares page.
-
Storage accounts are typically created by the IT Manager in the Microsoft Azure Administration Center.
-
To create one, go to the Wisefish Azure Storage Account page and click + New.
-
Fill out the required information. You will need an Access Key from the Azure Portal.

-
-
Set up a directory to store the files in. Go to the Wisefish Azure File Explorer page.
Select the Directory for File Storage.
-
In the Fish Market Setup define the following:
-
Document File Path - is the same value as the directory set up in the previous step for file storage. This is where the user want to store the imported file.
-
Azure Store Name for Document - Same as the storage account set up in a previous step.
-
Azure File Share Name for Document - Same as the storage account name set up in a previous step.
-