
In a storage room containing multiple racks, each rack contains a set of bays. And each bay stacked up with several shelves, a wizard has been provided to create multiple bins. It is accessible from the Trade Items Zones list.
When executed, following page appears showing the first step in the wizard:

-
Zone Prefix Code - Set this for the first part of the code, for the unique identity of the bin.
-
Delimiter Type - This field have two options:
-
None – No special character will be inserted between the Zone Prefix Code value and the following code in the next step of the wizard.
-
Dash (default) – A dash is inserted between the Zone Prefix Code value and the following code in the next step of the wizard.
-
-
By-pass Check On Existing Elements field - Allows the creation method to by-pass the check on existing elements (aisle, rack, bay, shelf or bin). This feature provides the additional option of running the wizard in multiple times for the same zone using different parameters, in the circumstance where the elements do not share identical entities overall. For example, some racks have different no. of bays or shelves in-between.
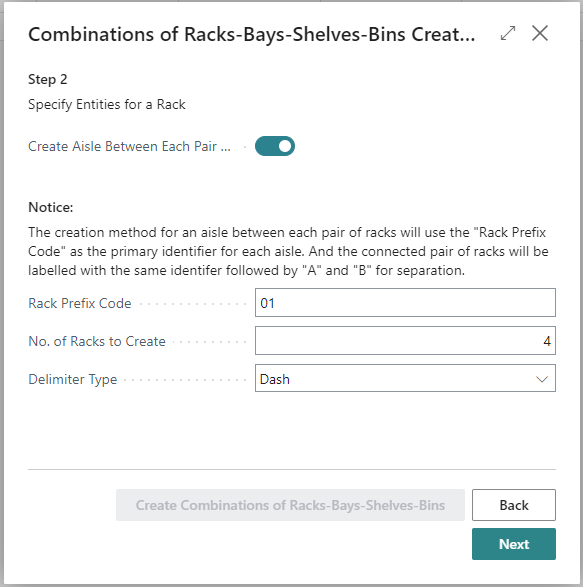
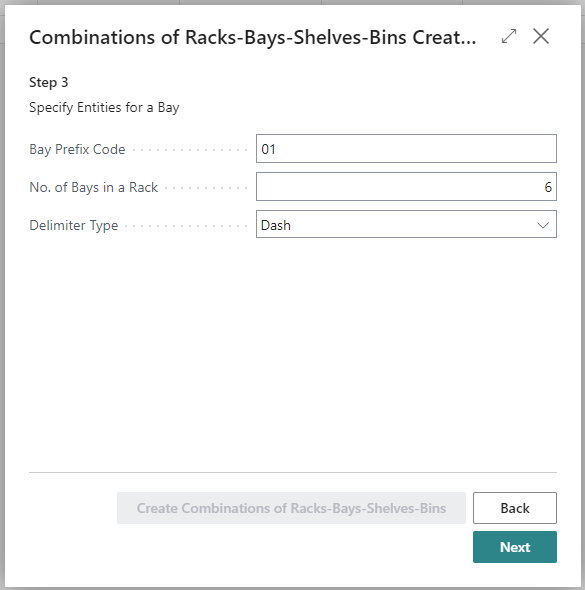
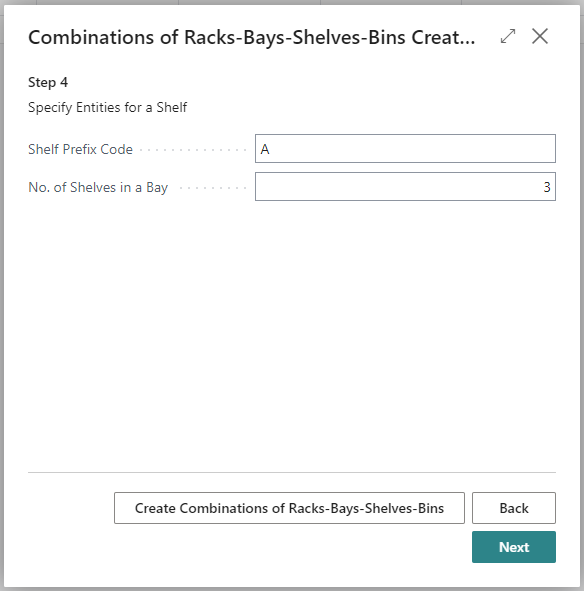
A similar specification takes place in step 2, 3 and 4 in the wizard:
In the 5th and final step of the wizard the page looks like this:

-
Create Multiple Bins per Shelf - Used for the circumstances when each shelf is to be subsided into more than one bin position. Then the grey colored fields are enabled to specify No. of Bins to Create per Shelf and the Delimiter Type (likewise as in previous steps).
-
Capacity No. of Pallets - to tell how many pallets can be put into the bin
-
Length, Width, Height - It is optional to put in the dimensions of the bin entities. These values are for informational purposes only and do not have any inflictions in the operation of WW on functional level.
Click the button to create bins.
After executing the wizard, figures appear in the Warehouse Zone Factbox that will show the structure of the corresponding zone, i.e. number of bins, racks, bays etc. as well as the capacity of pallets.

In the above example …
-
72 Trade Items Bins were created.
-
There are 4 racks and since there should be 6 bays in each, there are 24 bays in total.
-
No. of shelfs in a bay was set as 3, and therefore the total number of shelfs are 72.
Notice how the bin code has been created with combination of the prefix codes specified in the wizard:
Assign Priority Sequence Code to the Zone’s Bins
The purpose of having a priority sequence code assigned to a bin is to provide an option of labelling some bins with higher ranking in priority. For instance in the picking screen, the suggestion for the order which pallets are to be picked, is based on the content of priority sequence code for each related bin which the pallets allocated to picking resides in. In some rack-storage systems, the order in which the pallets are put or picked, in & out of each rack has to follow a certain manner. Therefore, this option is here to support this method.

But action opens up the following dialog screen:
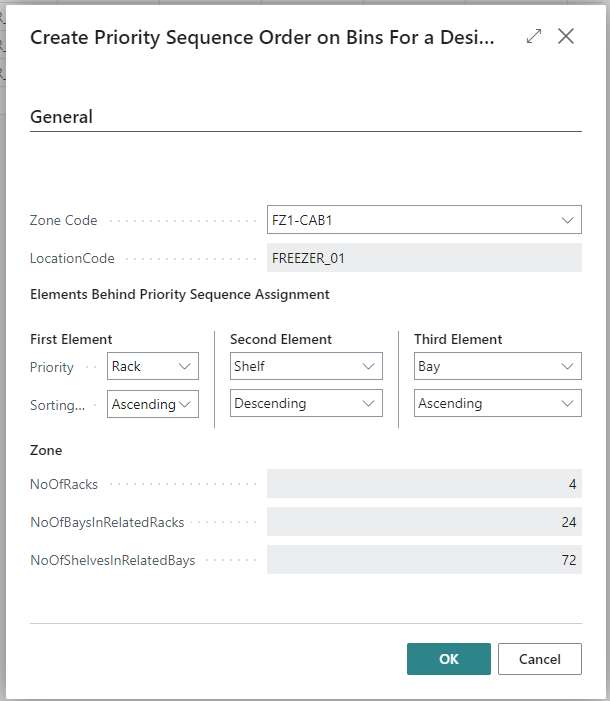
The key elements for the deciding the priority sequence are the Priority fields for all the 3 elements. Afterwards, the priority sequence code has been assigned to all the bins for that particular zone:

rekka-stæðu-hillu-hólfa-samsetning LEIÐSÖGN